
 Aktif Konular
  Üye Listesi
  Takvim
  Arama
Arama |
Aktif Konular Üye Listesi Takvim Arama |
| |
| Tayyareler | |
| |
  |
| << Önceki Sayfa 2 |
| Yazar | Mesaj |
|
Nick_Karatzides
Üye 

Kayıt Tarihi: 06/06/2009 Aktif Durum: Aktif Değil Gönderilenler: 250 |
  Gönderim Zamanı: 14/07/2011 Saat 01:09 Gönderim Zamanı: 14/07/2011 Saat 01:09 |
|
I pinned a styrene plastic sheet on the wooden frame, insert it into the preheated electric oven as described before and as soon as I noticed that the plastic got warm enough and started drooping down, I removed it from the oven and thrown the sheet on the vacuum former plate, while the vacuum cleaner was already plugged & switched on. This procedure may take some practice and sometimes a mould tips over or the plastic wont form properly over the mould (folding around edges). This is also the part where I should warn you that you can burn your fingers - I highly recommend Nomex Aramid flame resistant MilSpec gloves, which I personally use for the job. I buy large plastic styrene 50x30cm sheets for 0.5 to 1.5 each (depending width), not the more expensive styrene by Evergreen. When an attempt fails, I usually throw the sheet back in the oven and start again. Once you have the machine, you can make all kinds of things. You can make a lot of aircraft wings, airframe, panels etc out of a sheet like that. You can make the master moulds from balsa wood, epoxy, polyester etc and the parts you make depend on how accurate the master moulds are. The moulds must be as accurate and detailed as necessary to achieve the results you are after.
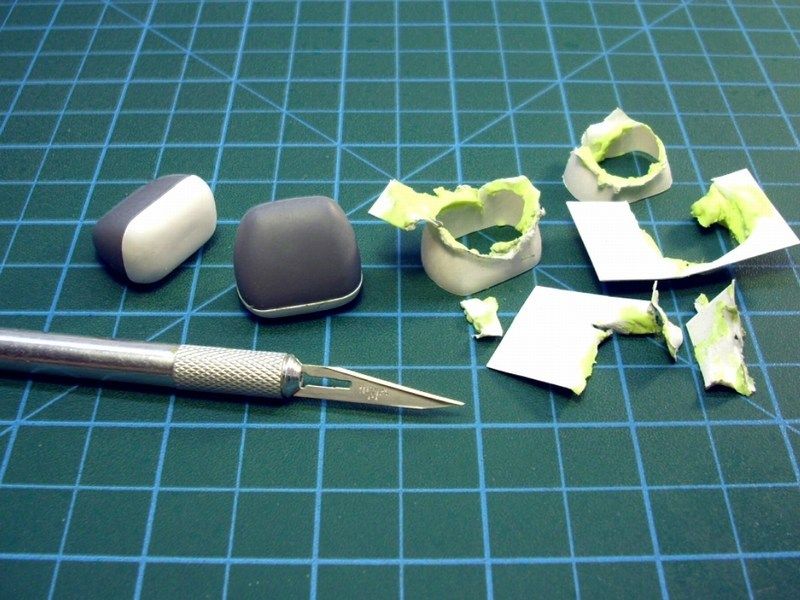
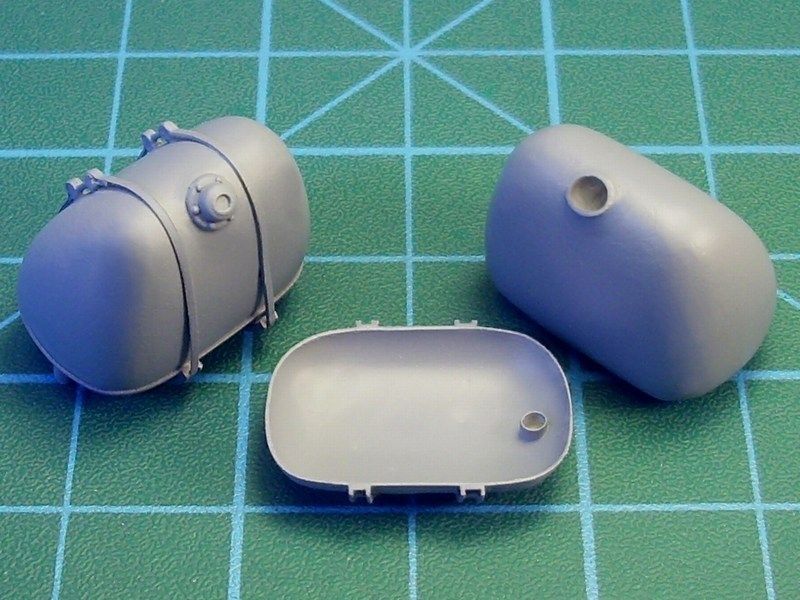
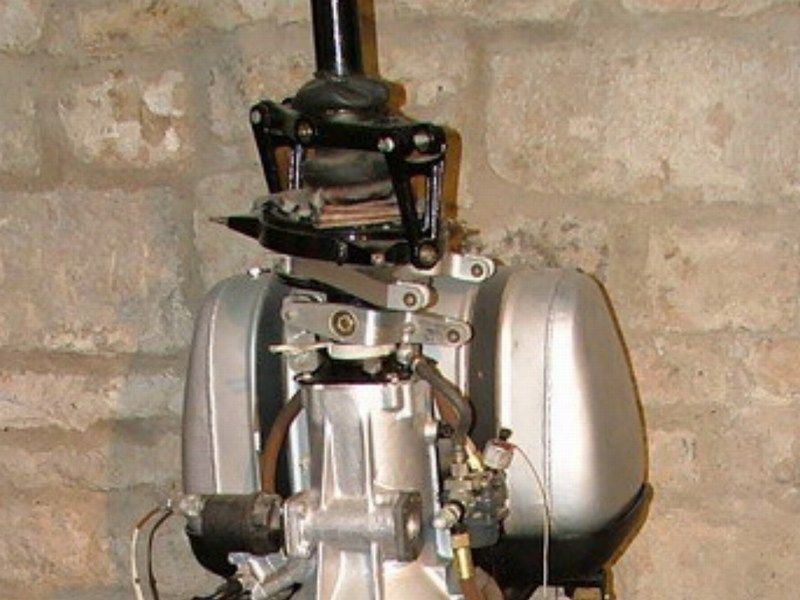
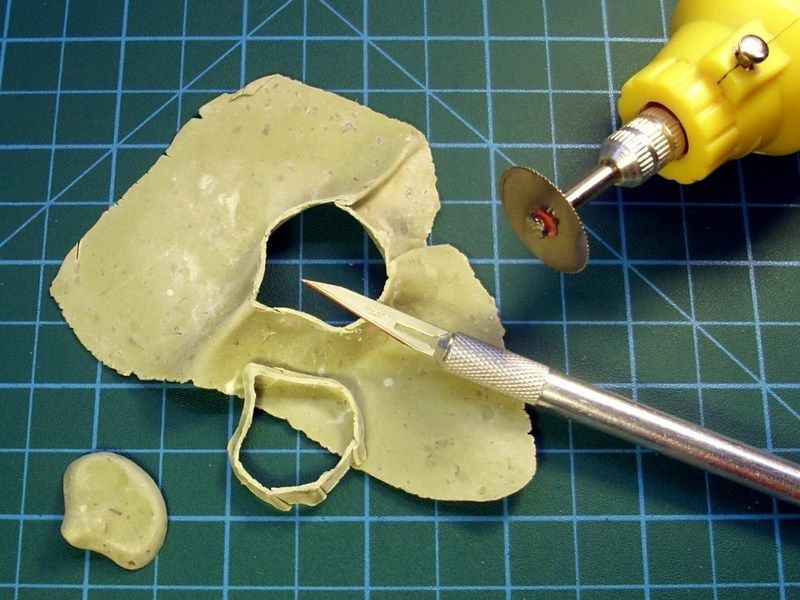
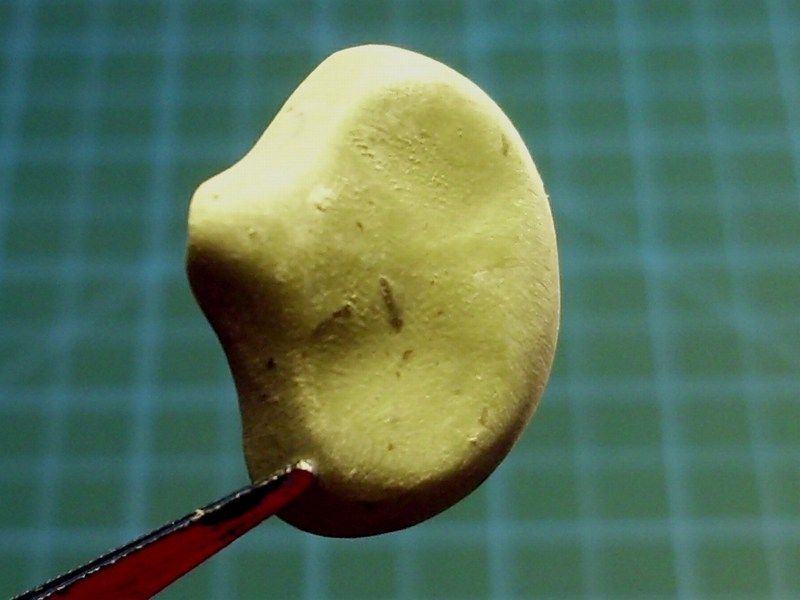
 The plastic nicely formed around the fuel tanks moulds and here is how it looks like. 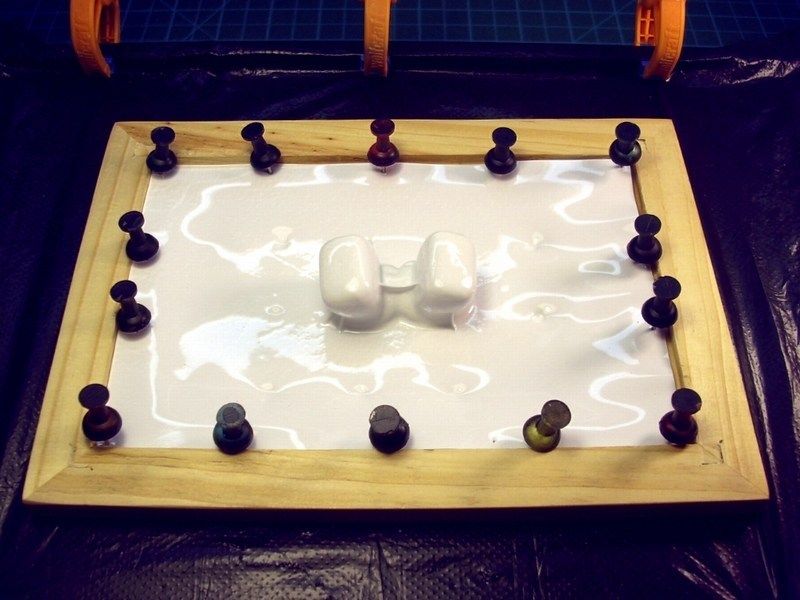 Using a new #11 stainless steel surgical blade, I removed the formed pieces from the styrene sheet. The yellow stuff appears in the picture, is plasticine surplus - the plasticine used to secure the twin epoxy tanks on the vacuum former plate and caged into vacuum formed plastic sheet. Later, these two receiver bases will be sanded as required and some details such as securing hoops and tensioners to keep the twin fuel tanks in place will be added. 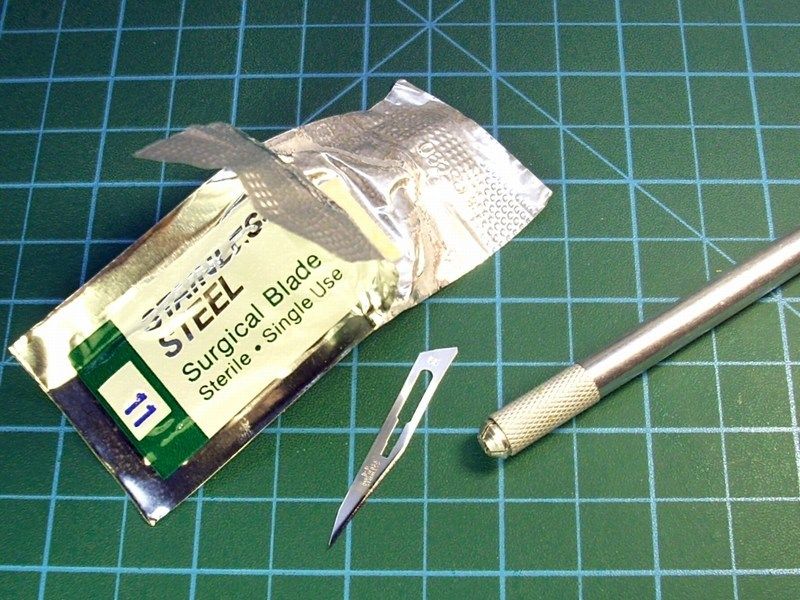
 Düzenleyen Nick_Karatzides - 31/01/2016 Saat 00:35 |
|
 |
|
|
Nick_Karatzides
Üye
Kayıt Tarihi: 06/06/2009 Aktif Durum: Aktif Değil Gönderilenler: 250 |
Gönderim Zamanı: 14/07/2011 Saat 01:09 |
|
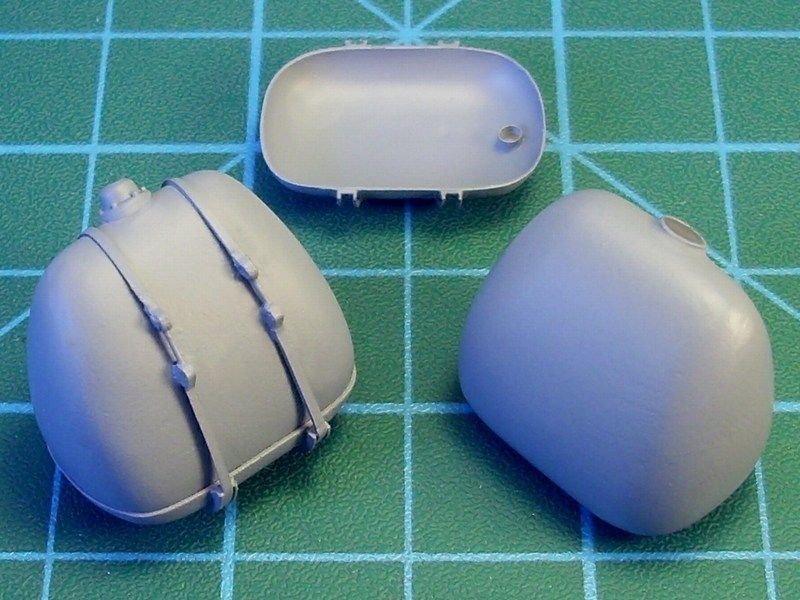
Some additional details were added to the fuel tank canisters. The left side fuel tank, was placed on the receiver base and strapped with hoops & tensioners to keep in place, while the right side fuel tank is to be placed on the ground, with the filler cap opened, simulating maintenance procedure.
 Düzenleyen Nick_Karatzides - 31/01/2016 Saat 00:36 |
|
|
|
|
|
AereapeR
Yeni Üye 
Kayıt Tarihi: 23/03/2010 Aktif Durum: Aktif Değil Gönderilenler: 1 |
Gönderim Zamanı: 15/07/2011 Saat 20:16 |
|
tremendous built progress, looking forward to it!
|
|
|
|
|
|
Nick_Karatzides
Üye
Kayıt Tarihi: 06/06/2009 Aktif Durum: Aktif Değil Gönderilenler: 250 |
Gönderim Zamanı: 28/09/2011 Saat 18:31 |
|
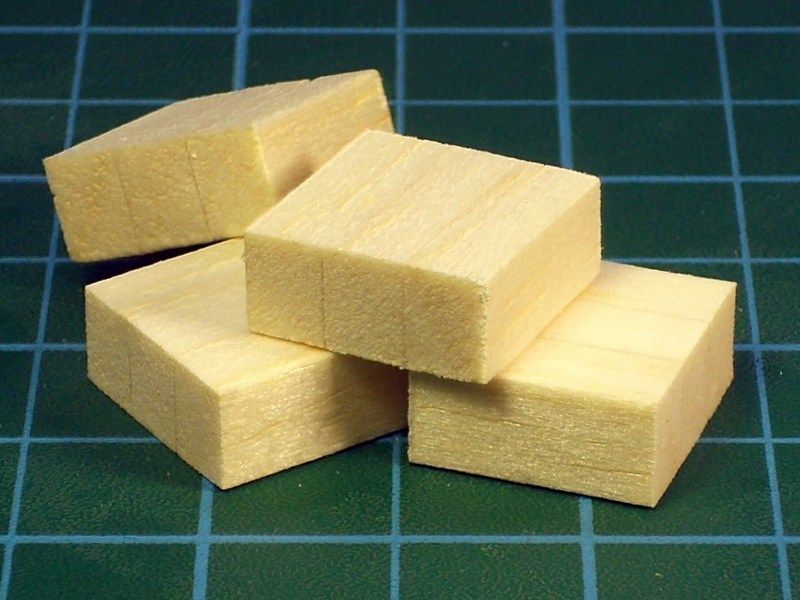
Finally, the landing pad base supports, built using balsa wood slats.
 Düzenleyen Nick_Karatzides - 31/01/2016 Saat 00:36 |
|
|
|
|
|
Nick_Karatzides
Üye
Kayıt Tarihi: 06/06/2009 Aktif Durum: Aktif Değil Gönderilenler: 250 |
Gönderim Zamanı: 04/10/2011 Saat 02:34 |
|
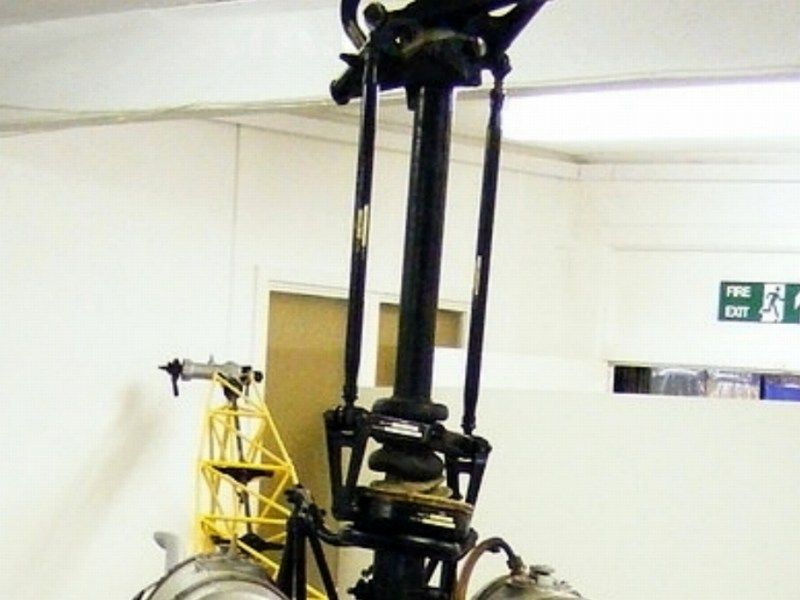
The rotor blade is made of styrene sheet softened in boiling water to stretch 'n' turn in a way to look realistic. I also tried soft and careful sanding on the blade's leading edge to be shaped as realistic as it should be. The transmission shaft components and minor details also made of styrene, sprue and metal wire bond together with CA super glue. Everything was sprayed with Humbrol light grey primer when ready to paint. 
 Düzenleyen Nick_Karatzides - 31/01/2016 Saat 00:47 |
|
|
|
|
|
Nick_Karatzides
Üye
Kayıt Tarihi: 06/06/2009 Aktif Durum: Aktif Değil Gönderilenler: 250 |
Gönderim Zamanı: 04/10/2011 Saat 02:34 |
|
Model parts were washed with liquid soap and warm water to disappear leaving oil traces, fingertips etc and then sprayed with Humbrol light grey primer.  Düzenleyen Nick_Karatzides - 31/01/2016 Saat 01:06 |
|
|
|
|
|
Nick_Karatzides
Üye
Kayıt Tarihi: 06/06/2009 Aktif Durum: Aktif Değil Gönderilenler: 250 |
Gönderim Zamanı: 07/10/2011 Saat 01:35 |
|
Usually, there are two available options for a scale modeler, to apply paint on a model:
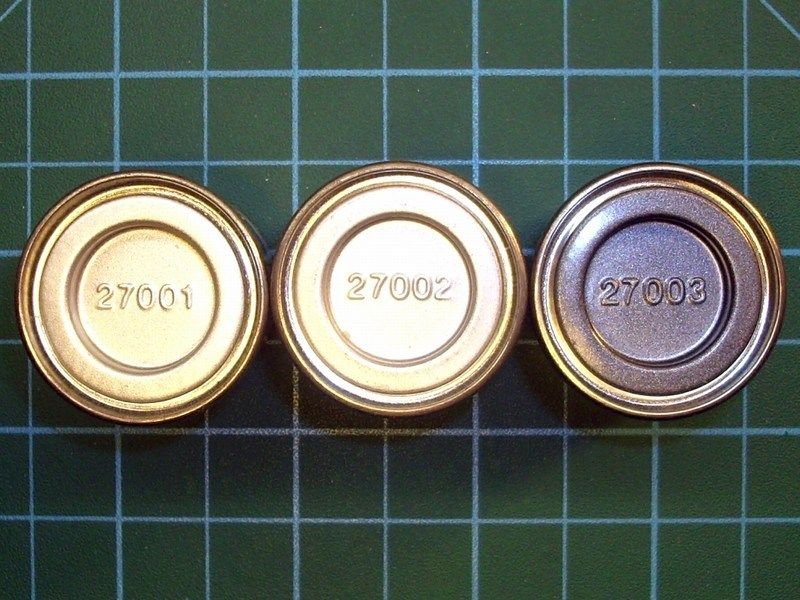
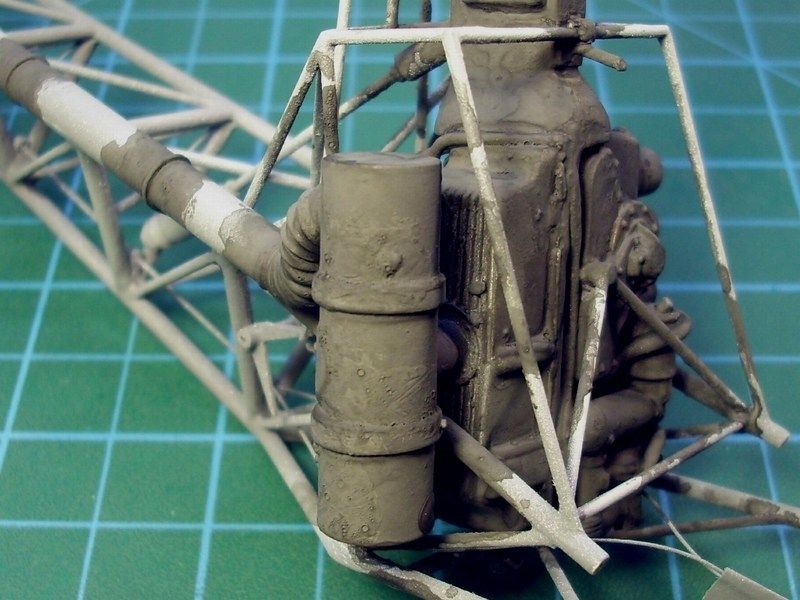
[*]Assemble the scale model parts first and paint the overall built model later. While building this Bölkow Bö-102 Helitrainer scale model project, the first option seemed as more appropriate and would make my job easy. Unfortunately, I had to follow the second option and that was not the only bad news. Building first and painting later, would be more difficult and would take much longer, but the reason I chose first to assemble most of parts and paint later, is because most of the Bölkow Bö-102 Helitrainer scale models airframe consists of a tail boom structure, in which contained the Hirth 3-cylinder / 2-stroke 40hp ILO L3X375 piston engine, the transmission components, the cable wiring etc that could not be masked without causing any damage. It could be very difficult maybe impossible - to airbrush for example the tail boom and manage to leave the interior details remain unaffected by the painting same time. Here comes the bad news: Tail boom structure would be painted by using fine brush and lot of patience to avoid leaving any brushing marks that would be clearly visible on such a big scale as the 1/18 is.  After preparing the engines basic elements, connecting electric cables and oil or fuel lines, I airbrushed the engine block with Life Color LC24 Matt Aluminium FS37178 acrylic paint as a base coat and apply darker enamel mixtures using the Humbrol #27001, #27002, #27003 metal cote paint and finally add some Mr Metal Color #212 Iron on the engine and let about 24hrs to dry before trying dark brown and black washes. 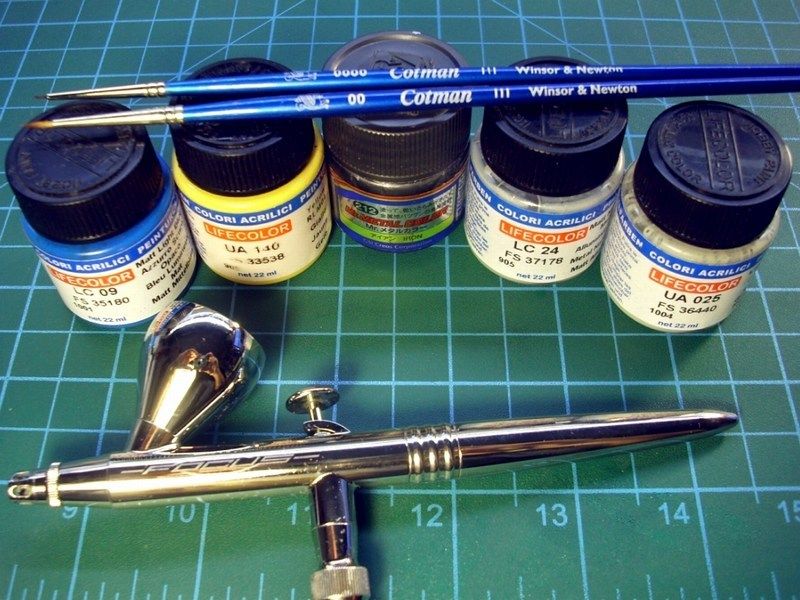
 As I personally believe that following simple techniques and sometimes unconventional methods, result in superior effects, I usually do not use enamel or acrylic paint to wash, because I feel risky when applying the paint mixture and let it run. I prefer an easier technique that can be undone if the results are poor - that makes it the perfect technique. I use hard chalk pastels to wash (NOT oil pastels). The hard chalk pastels, looks like a teacher would use on the blackboard in school. Do not use the soft oil pastels that artist use to draw on paper. The hard chalk pastels are easy to find in a variety of colours into your local art store or maybe Wal-Mart if in US or ASDA if in UK. 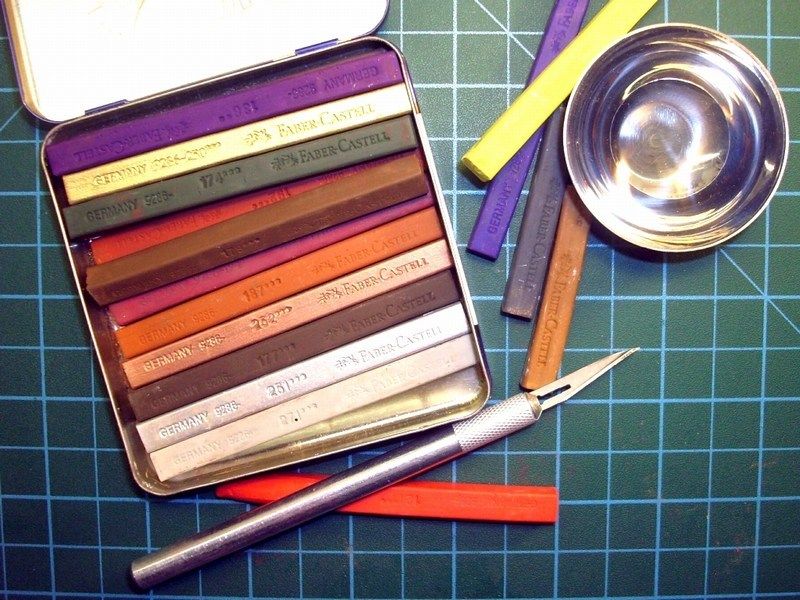 To do the wash, I use an blade, a small metal or plastic container, an old toothbrush, dish washing soap and a bit of water. Begin by scraping some chalk powder from the side of the chalk pastel stick, carefully put this chalk powder into the small container and add a tiny amount of water and stir. It is important to add a tiny amount of water in order to make the mixture look like mud - not like soup! For this reason, I use a syringe to add just few drops on the hard chalk pastel powder and I stir using the old brush. Because the chalk powder doesn't mix well with the water, a drop of dish washing soap is needed to break the surface tension of the water and also acts as a glue to help the chalk powder stick to the model. 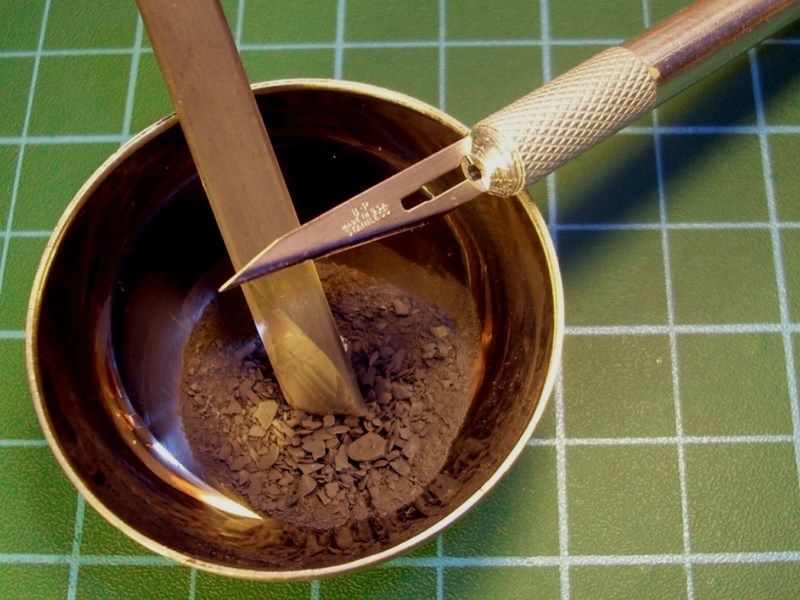
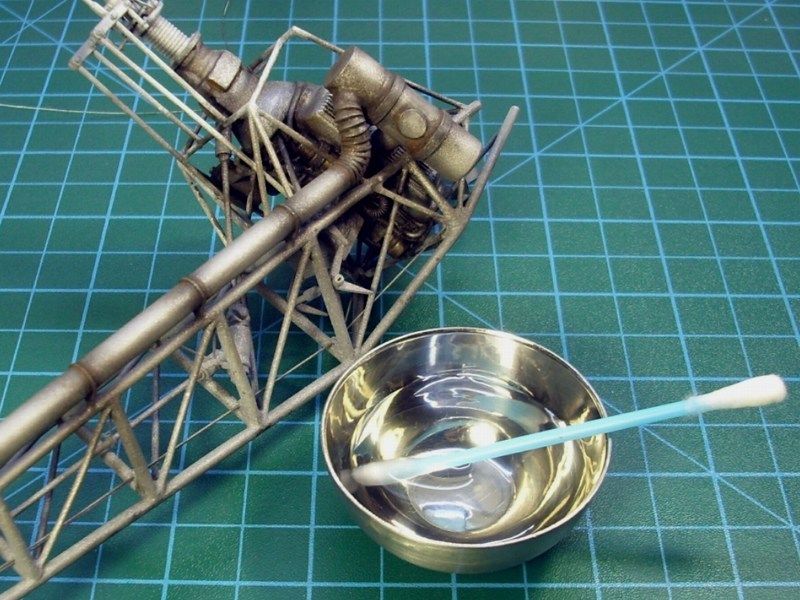
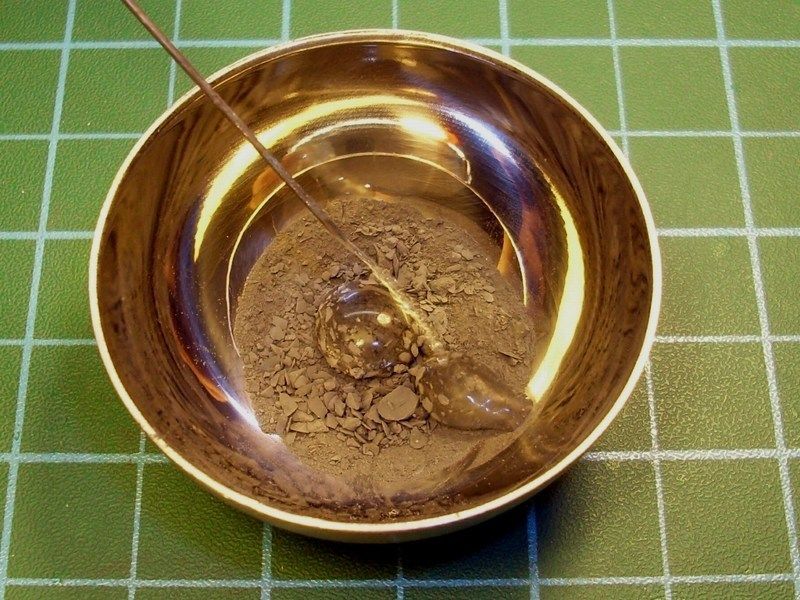 Once the chalk is fully dissolved into the water/soap mixture it is time to paint this mixture onto the model's engine. Painting the mixture is simple - just apply it anywhere it is needed to darken recessed detail. The mixture can be applied carelessly, because any mistakes can be completely removed and redone. Once the chalk wash dried, I rubbed off the high spots with a slightly damp dry (not wet) Q-Tip cotton swab (Kleenex papers can be also used) and I wiped the dark colour from the areas should be light & shinny. The high spots were cleaned to the bare metal finish and the low spots were left black. I did the chalk wash on the engine in under 30 minutes which makes it a very quick and effective technique. 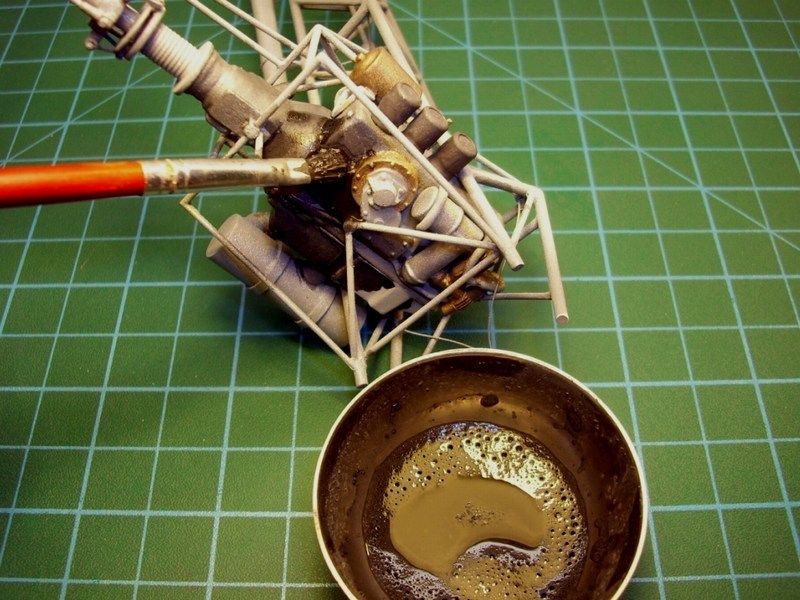
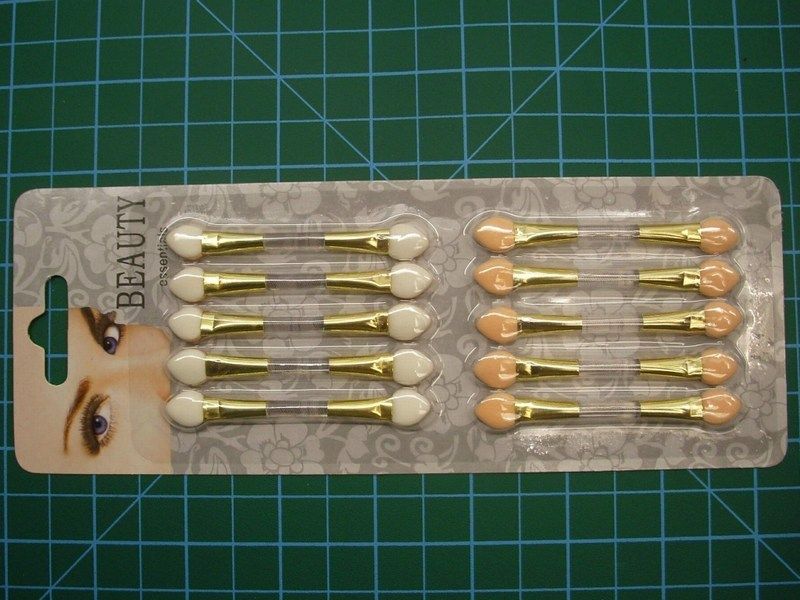
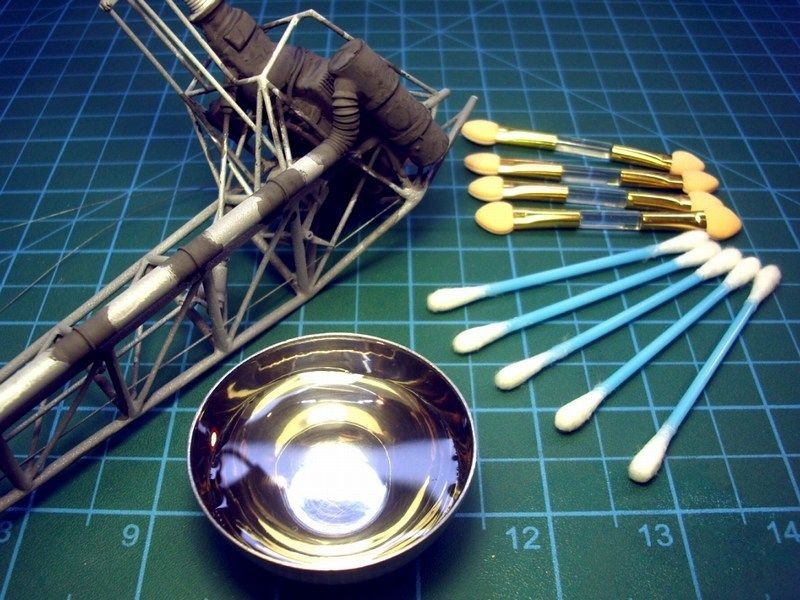 Some of the wash mixture is re-applied and the wash being wiped completely out of the narrow points. If you follow this method, it is adviced to not rinse out the wash container till you are finished this job. You will probably be touching up certain spots a few times, so it helps if you're not mixing up a new chalk mixture each time because you kept cleaning out your container of the chalk wash mixture. As soon as I paint the electric cables, the oil or fuel lines etc, I repeated the wash process with lighter colours where needed. Using micro cotton batons found into cosmetic shop for less than 1£, I applied some brown chalk pastel powder on the engine's chrome exhaust, to make it look overheated. I repeated the weathering process until it satisfied me and finally I sprayed a Humbrol clear coat to seal the chalk powder on the engine. Düzenleyen Nick_Karatzides - 31/01/2016 Saat 01:06 |
|
|
|
|
|
Nick_Karatzides
Üye
Kayıt Tarihi: 06/06/2009 Aktif Durum: Aktif Değil Gönderilenler: 250 |
Gönderim Zamanı: 07/10/2011 Saat 21:59 |
|
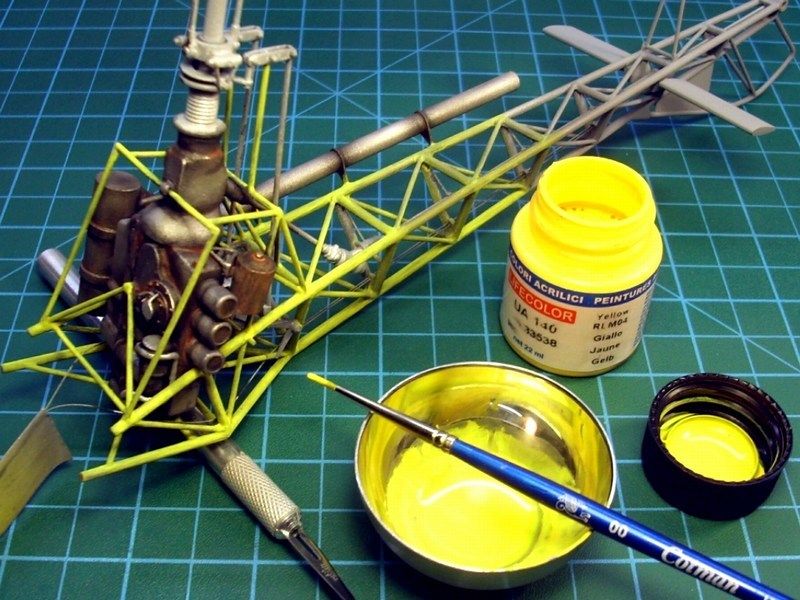
Dark brownish pigments & chalk powder shades, dissolved in water and spread in selected engine block spots gave a better look. When satisfied with the result, I began the tail boom painting process. To do so, I used the Life Color UA140 Yellow RLM 04 FS33538 colour which is actually the colour found into the official Bölkows technical order manual. Paint applied over 2-3 very diluted (almost pure water) thin layers, one after another, using a fine brush, keeping in mind that leaving paint marks should be avoided.
 Düzenleyen Nick_Karatzides - 31/01/2016 Saat 01:07 |
|
|
|
|
|
Nick_Karatzides
Üye
Kayıt Tarihi: 06/06/2009 Aktif Durum: Aktif Değil Gönderilenler: 250 |
Gönderim Zamanı: 14/10/2011 Saat 02:54 |
|
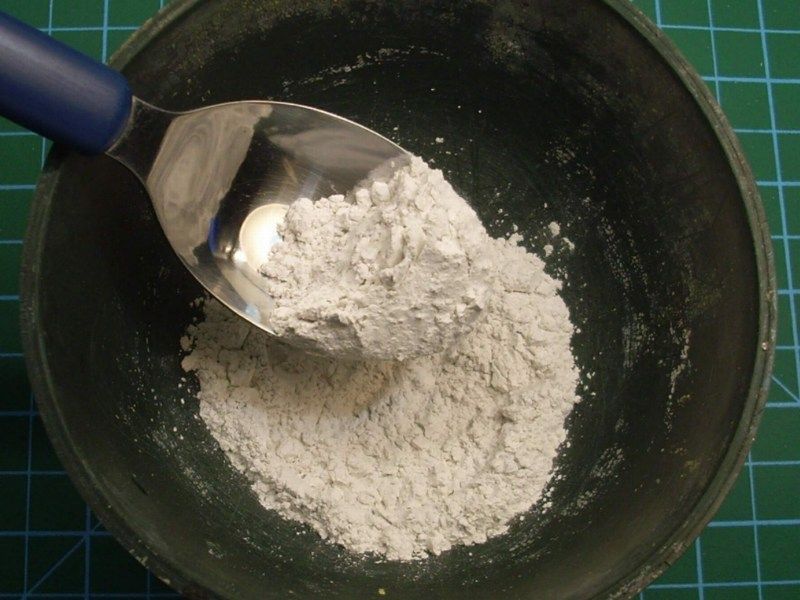
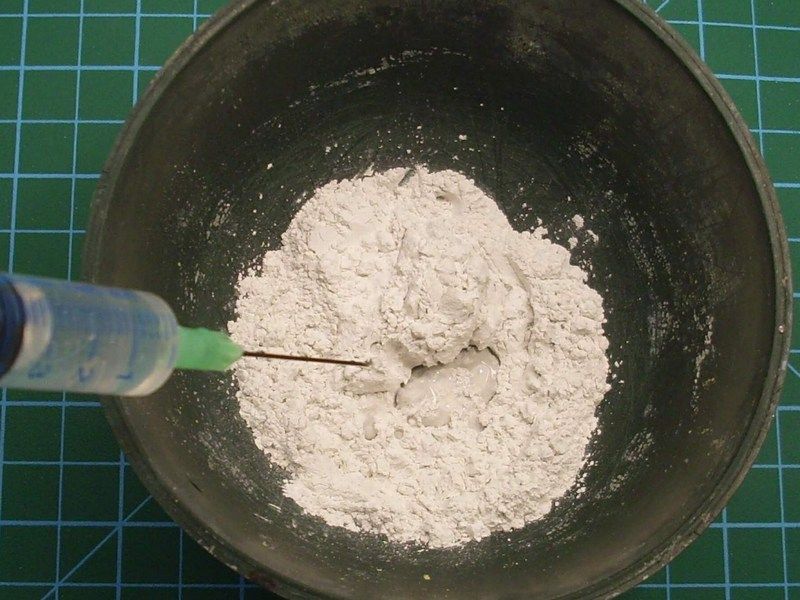
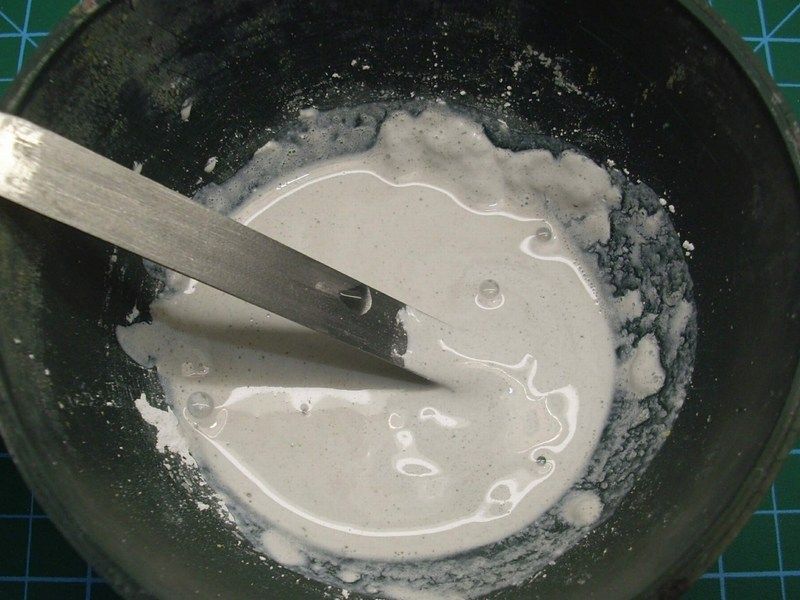
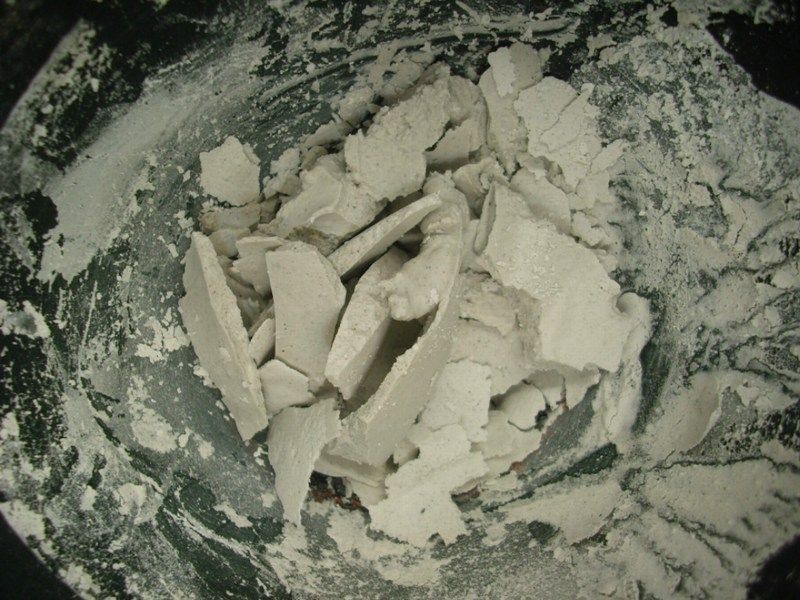
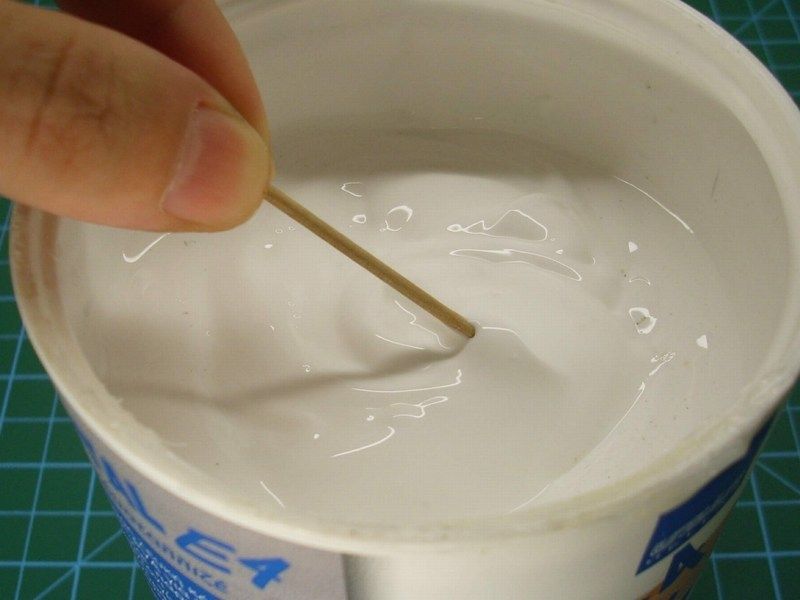
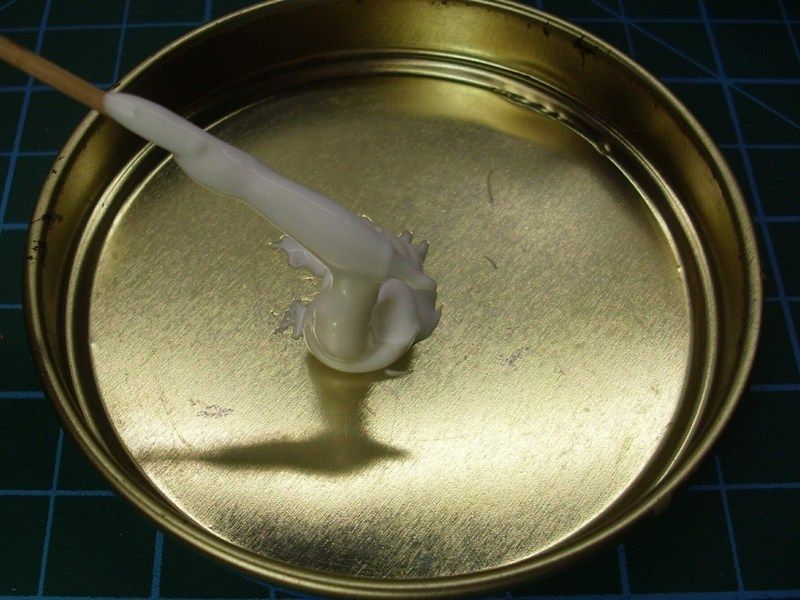
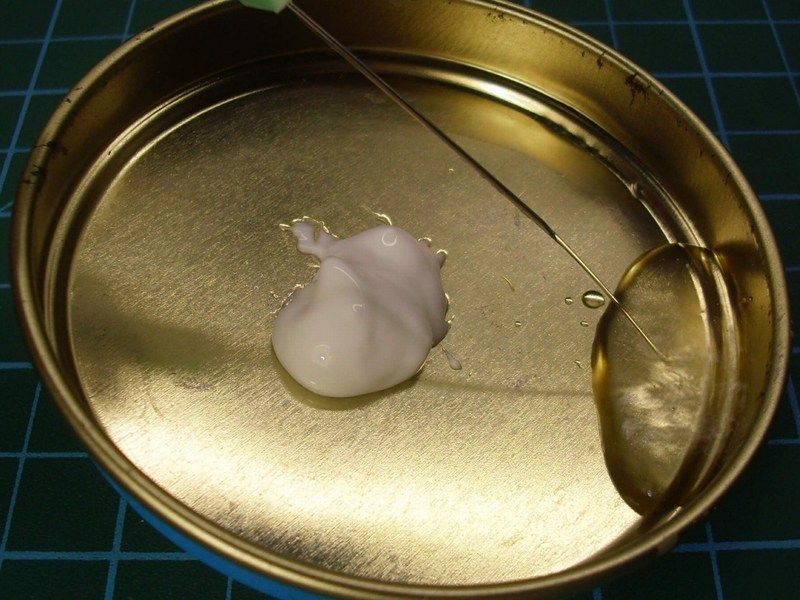
I found nice idea to place the Bö-102 Helitrainer on a display base, simulating a concrete ground area. The idea was to establish the picture of an abandoned small airfield in Vlotho, where the Helitrainer used to rest for decades till found and finally donated to the Hubschraubermuseum helicopter museum in Bückeburg, Germany. The museum workshop team, managed to restore it and display it as on of these experimental helicopter training devices. From my local store, I bought a 20x30cm polished wooden picture frame. 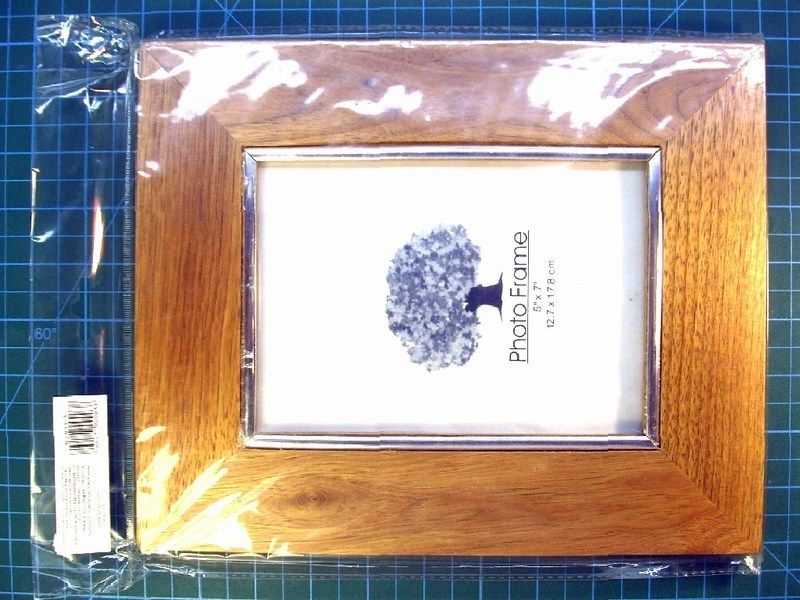 I add some grams of plaster powder and few drops of water with a syringe into a soft rubber cup to make the right mixture. Materials like plaster, start as a dry powder that is mixed with water to form a paste which liberates heat and then hardens. Unlike mortar and cement, plaster remains quite soft after drying and this characteristic make plaster suitable for the job. Keep in mind that adding salt into wet plaster mixture, reduce the plaster's hardening time and adding vinegar into wet plaster mixture, extend the plaster's hardening time. When the first layer of thinned plaster applied on the picture frame, a glass were pushed against the plaster to form a flat basic strong cast. The basic idea, is to produce a totally flat cast and later add some detail or apply extra stuff where is needed. 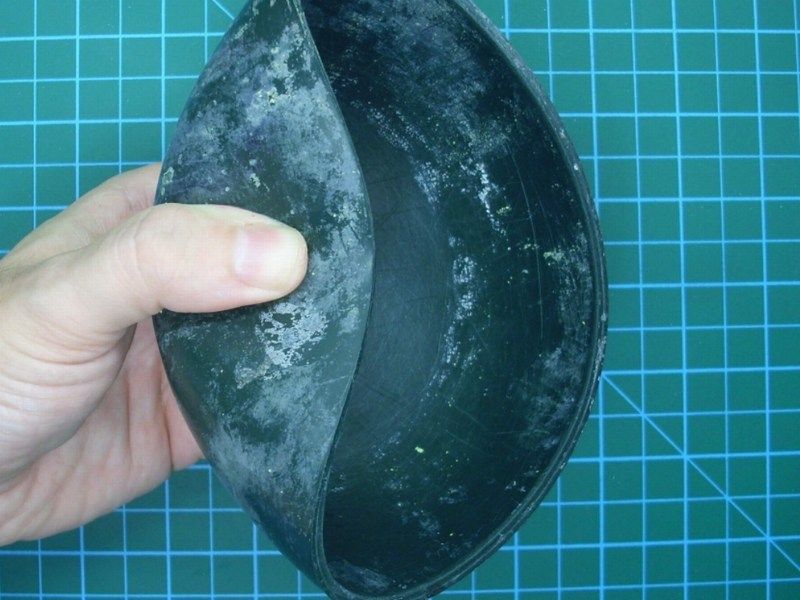
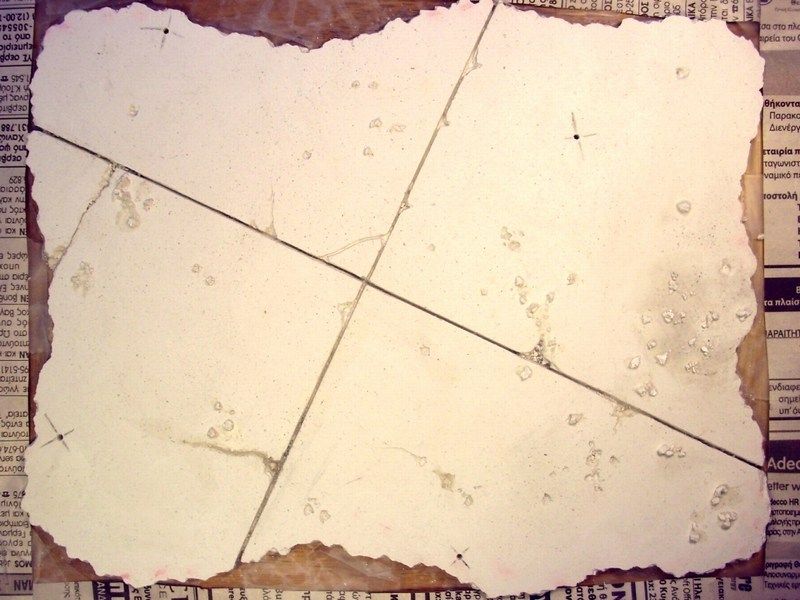 I left it few hours to get harden in order to be sure that the cast wouldn't break when I would try to cut it into desired shape. Meanwhile, I took the soft rubber cup which I used to make the plaster mixture, squized it to break the last hardened plaster left inside, so it would be easier for me to clean it afterwards and prepare it for any future mix. That's the reason this soft rubber cup were used for. 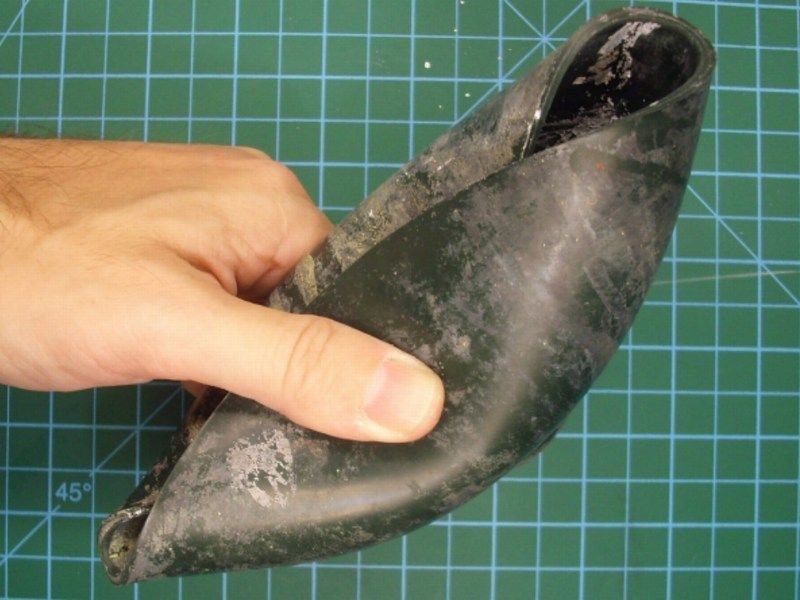
 As soon as the plaster cast got harden, cut into shape and the concrete plaques were lined with a scriber, I used my airbrush to paint it. After the polished wooden frame was covered with masking tape, three different acrylic paint layers were applied on the plaster surface. First, mat black colour covered the area and then a light grey applied with airbrush, spraying in almost zero degrees angle, to let the darker areas between the concrete plaques remain naturally dark. The corner was paint with earth tones and as soon as the acrylic colours dried, I tried some drybrushing on selected spots using sand tones. 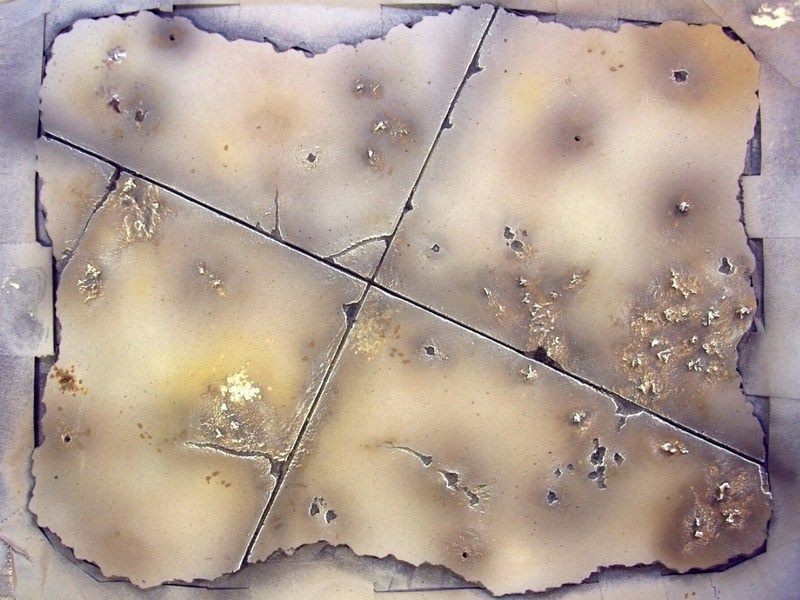 As for he grass & plants, I used different colors of static grass from my local hobby shop, empty them into a plastic box and make a mixture. 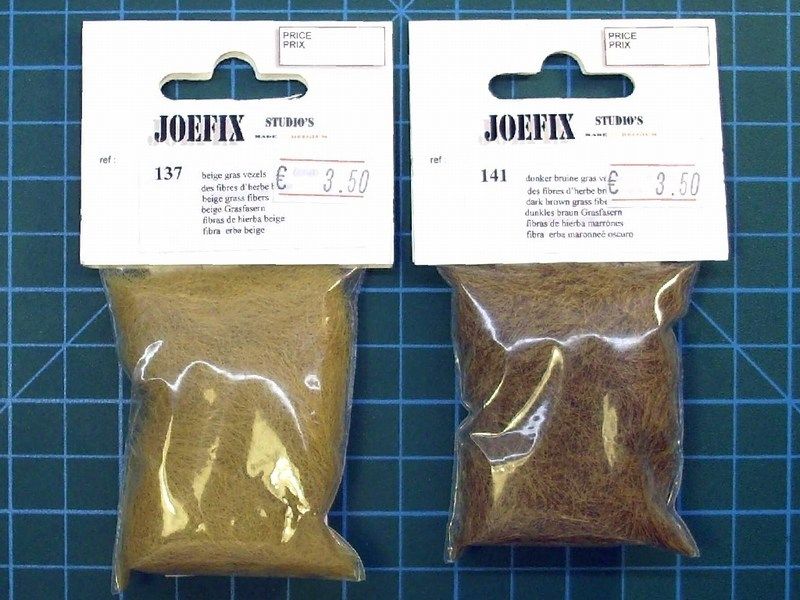
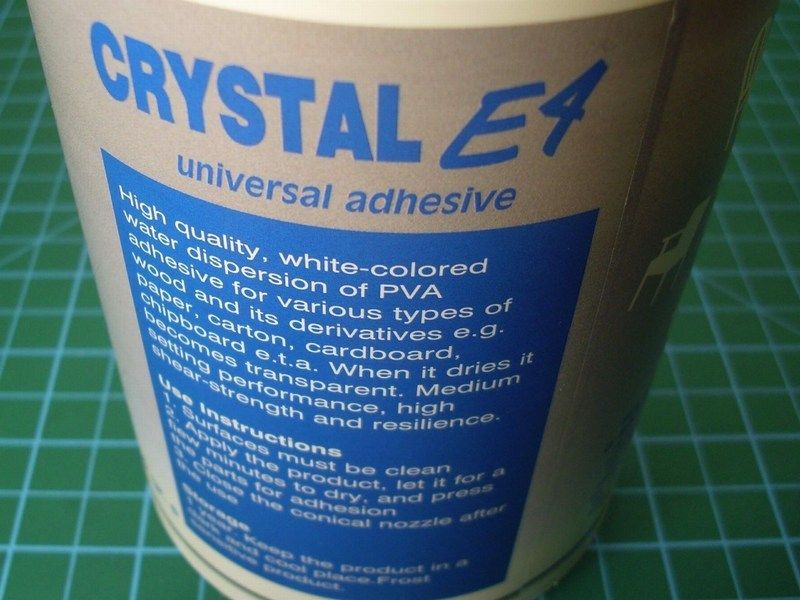
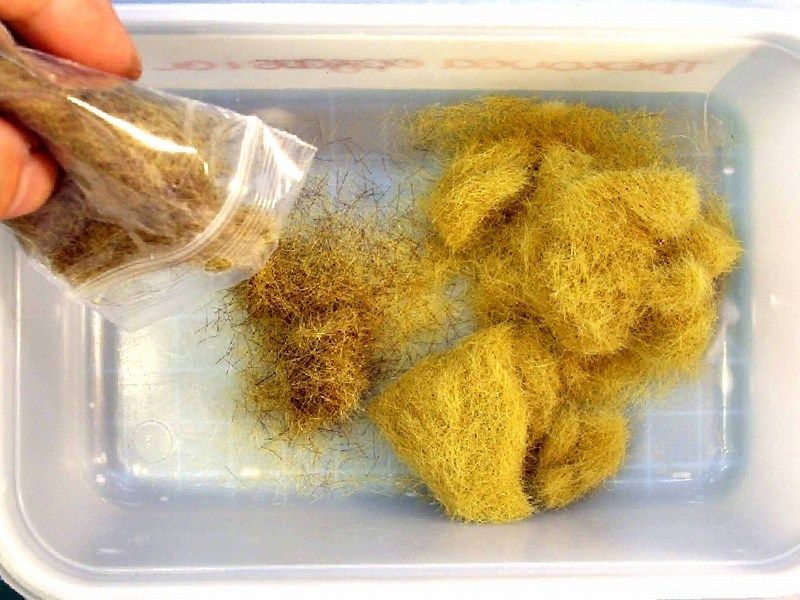 Water based white glue for wood, which becomes transparent when it dries, is just the right for the job. So, I opened a 500gr canister bought for 2 only, pick a small quantity, add just few drops of water with a syringe into a small metal container to make the right mixture and finally I applied on the desired areas to be filled with grass & plants, using a wet brush. Because the mixture is enriched with water based glue, it is easy to correct possible mistakes. 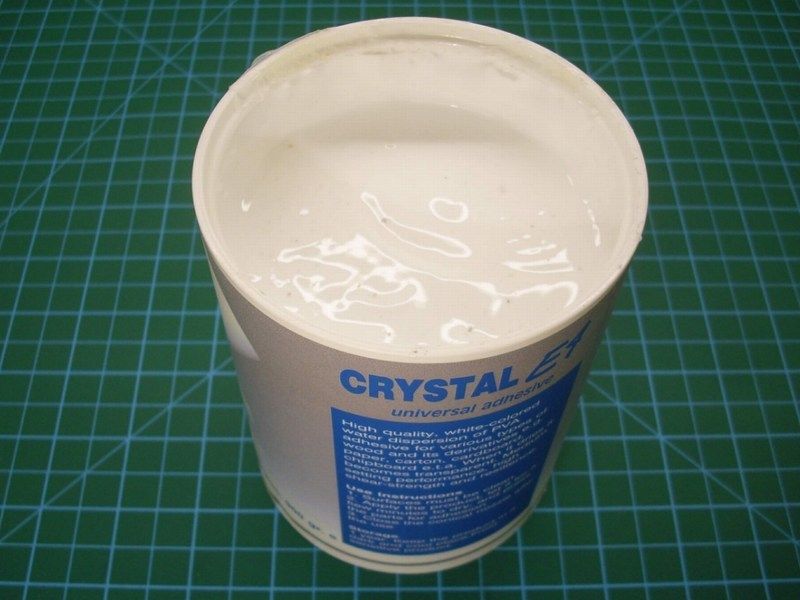
 As soon as the result was OK, I sprayed over with Humbrol enamel mat coat, to seal the paint and grass, so far. I left it overnight and as soon as the enamel mat coat dried, I add very few light & dust effects with chalk dust and pigments. Düzenleyen Nick_Karatzides - 31/01/2016 Saat 01:20 |
|
|
|
|
|
Nick_Karatzides
Üye
Kayıt Tarihi: 06/06/2009 Aktif Durum: Aktif Değil Gönderilenler: 250 |
Gönderim Zamanı: 14/10/2011 Saat 02:56 |
|
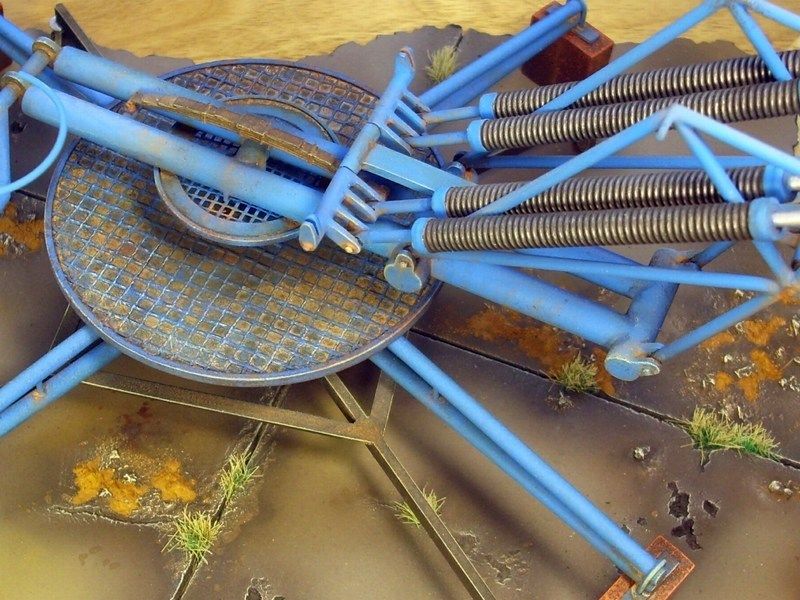
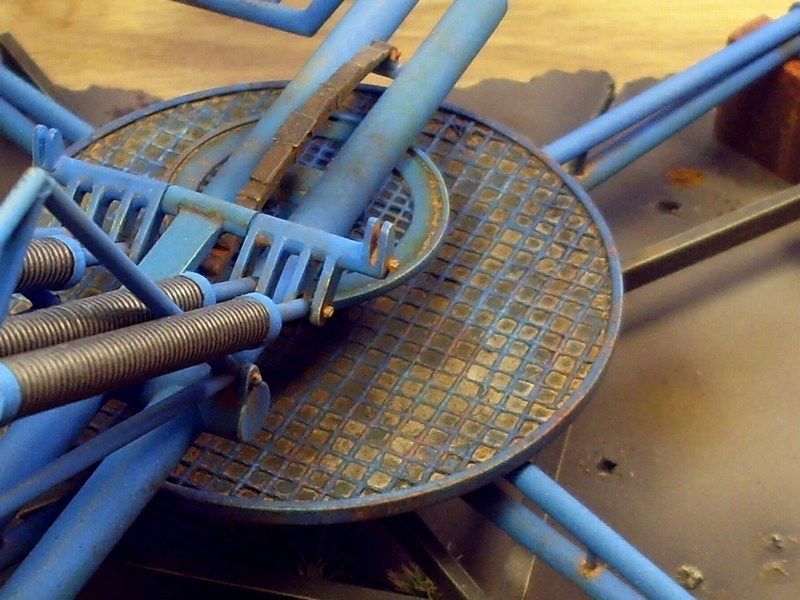
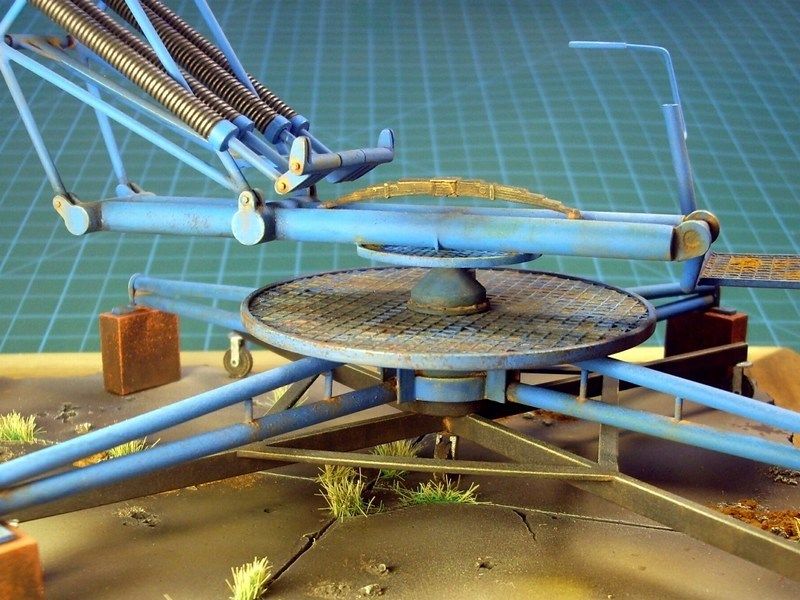
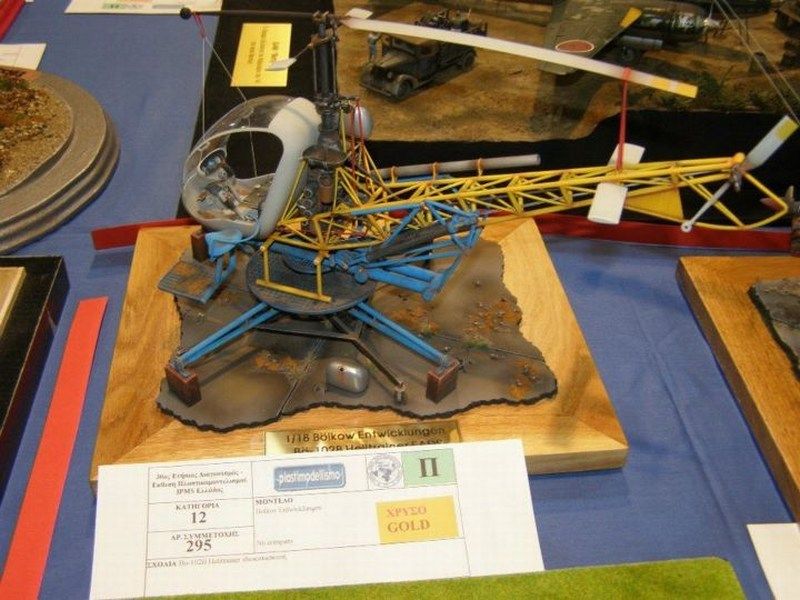
As soon as the individual scale models parts were already painted & weathered, I had to conclude the most difficult part. To assembly everything in one piece, without damaging the construction, the paint, the weather effect and of course ,my patience. Thats why I had to constantly monitor and try dry fit tests for each part during each step of this project, to ensure that I will not face any nasty surprises. The landing pad & the wheeled supporting base construction, would be the first to be placed on the tarmac display base. Everything secured in place with hidden pins encased in plaster & glued with CA super glue. 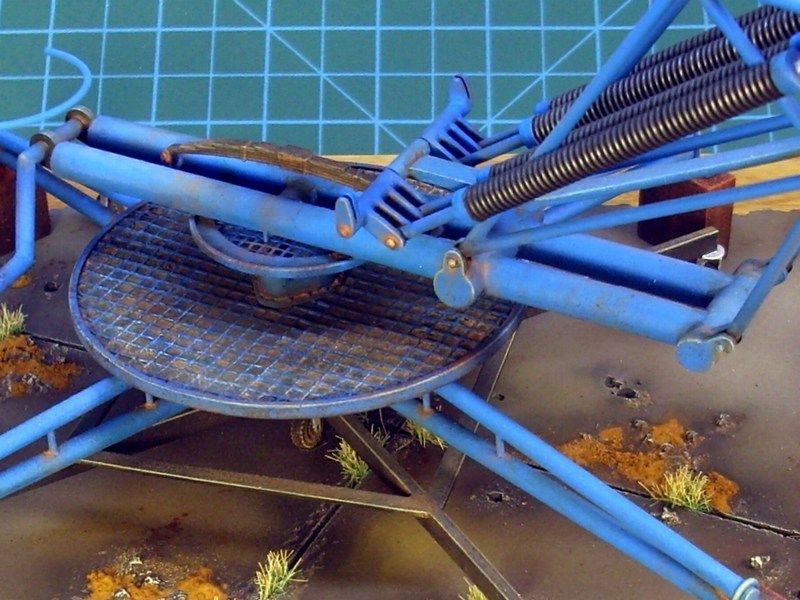
 Düzenleyen Nick_Karatzides - 31/01/2016 Saat 01:25 |
|
|
|
|
|
mithat
Üye
Kayıt Tarihi: 10/11/2008 Aktif Durum: Aktif Değil Gönderilenler: 233 |
Gönderim Zamanı: 14/10/2011 Saat 09:38 |
|
Sevgili Nick, bu e?itici, ö?retici ve inanylmaz güzel çaly?mandan dolayy önce te?ekkür sonra da tebrik ederim...
|
|
|
mithat
|
|
|
|
|
|
Nick_Karatzides
Üye
Kayıt Tarihi: 06/06/2009 Aktif Durum: Aktif Değil Gönderilenler: 250 |
Gönderim Zamanı: 15/10/2011 Saat 23:15 |
|
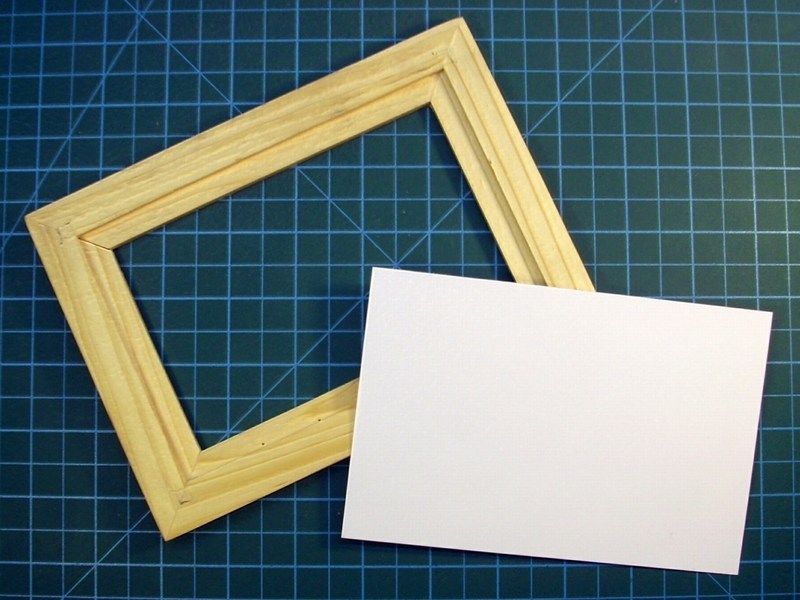
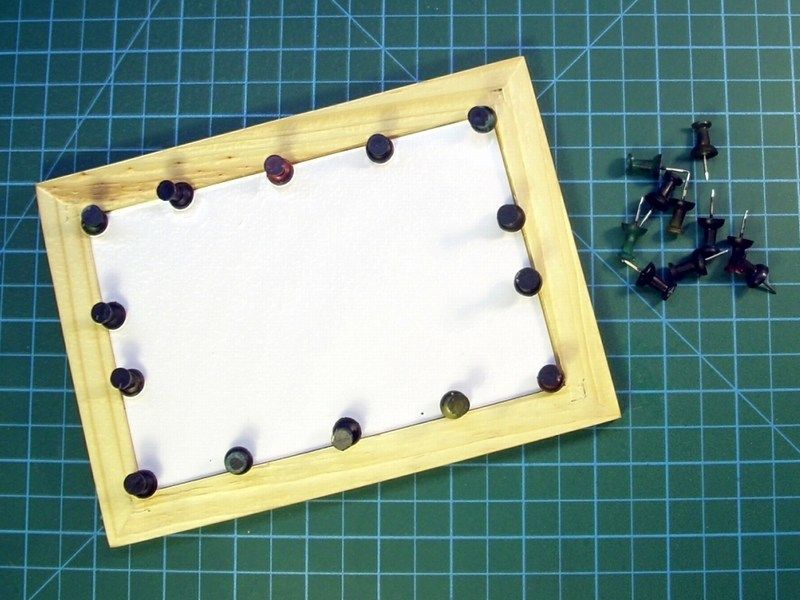
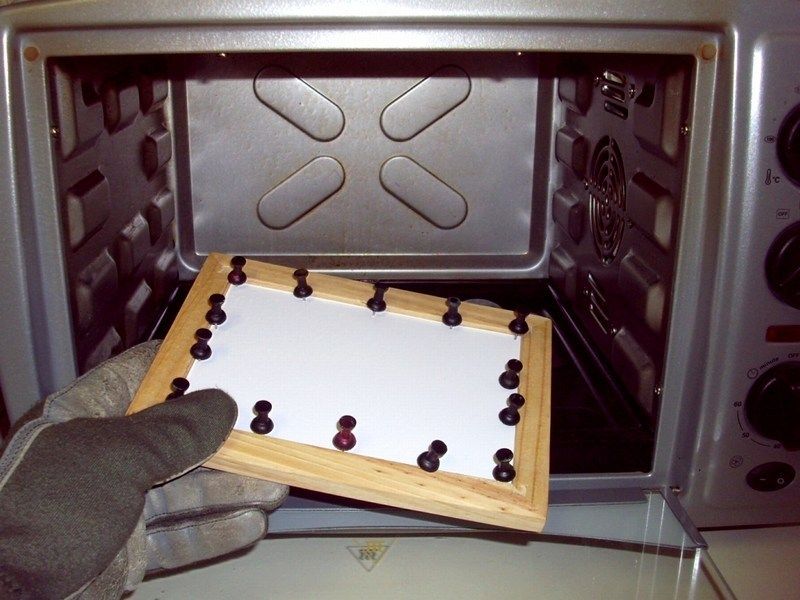
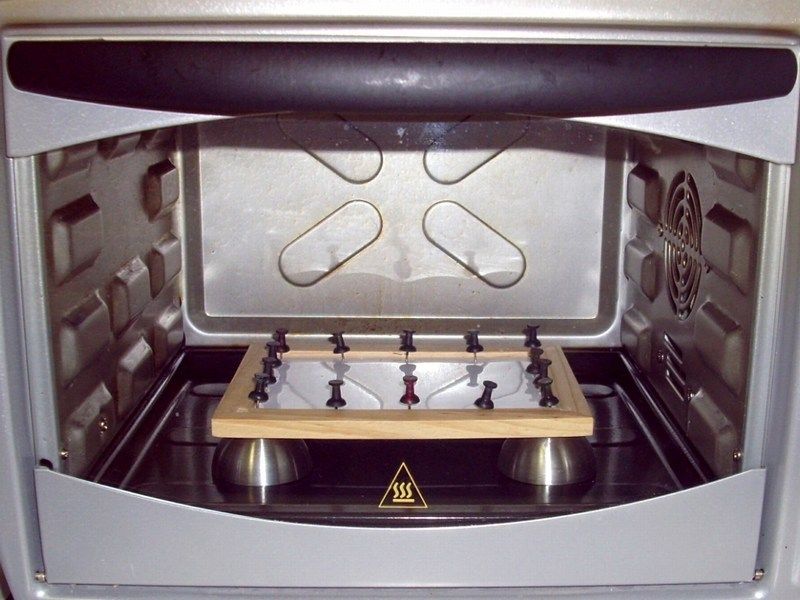
The Bö-102s cabin and one-piece glass bubble canopy, offers wide visibility for the student pilot. The absence of side doors is a benefit in a hot climate and also provides better vocal communication with trainer who sits nest to student pilot. Of course, canopy modifications can be done, as seen Bö-102s with total absence of glass canopy. As written and described into previous CHAPTER I, the basic shape of the thin-skinned, right-to-scale bubble typed canopy, was made by vacuum forming 1mm clear polycarbonate sheet, on a solid rock one-piece image cast made of modeling clay and additional layers of epoxy putty & polyester filler with fiberglass grains. To do so, the clear sheet were pined on a wooden frame, preheated into electric oven and as soon as I noticed that it started drooping down, I vacuum formed it. The clear sheet nicely formed around the canopy cast following the curves & details as planed. Using an X-acto knife, I removed the formed canopy bubble from the transparent sheet and start adding details, such as canopy's frame. 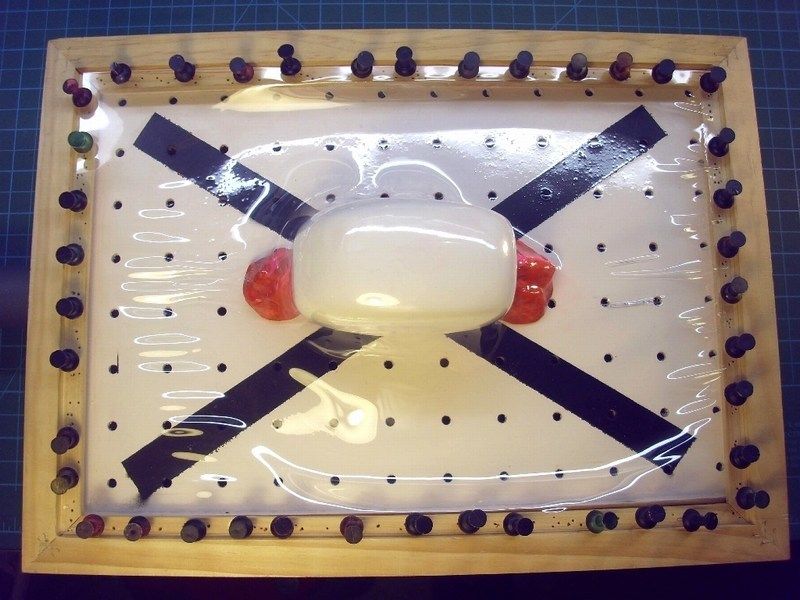 The clear canopy frame was made by 1mm masking tape. Few drops of CA super glue applied on the right spots with great caution. Remember that CA super glue does fog the transparent parts and this canopy would not be an exception - that's why I placed some very tiny drops of it, just on few spots to secure the installation. 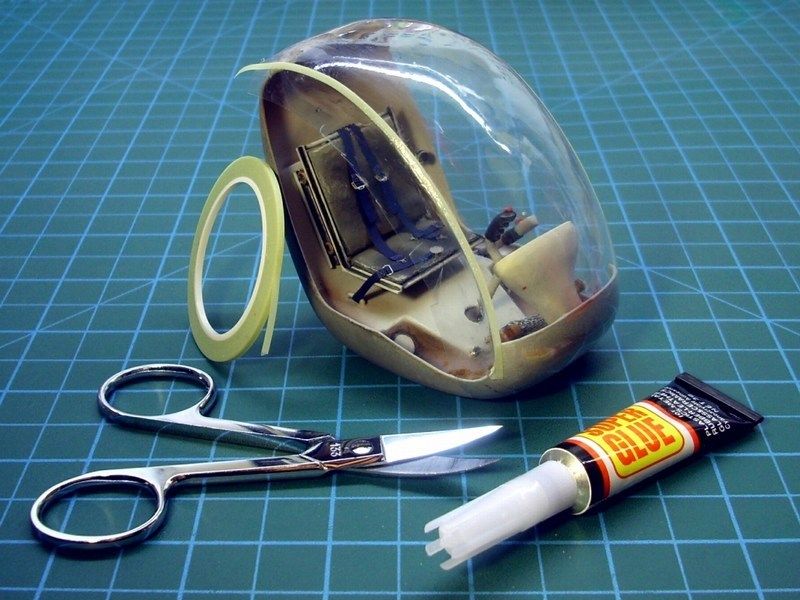
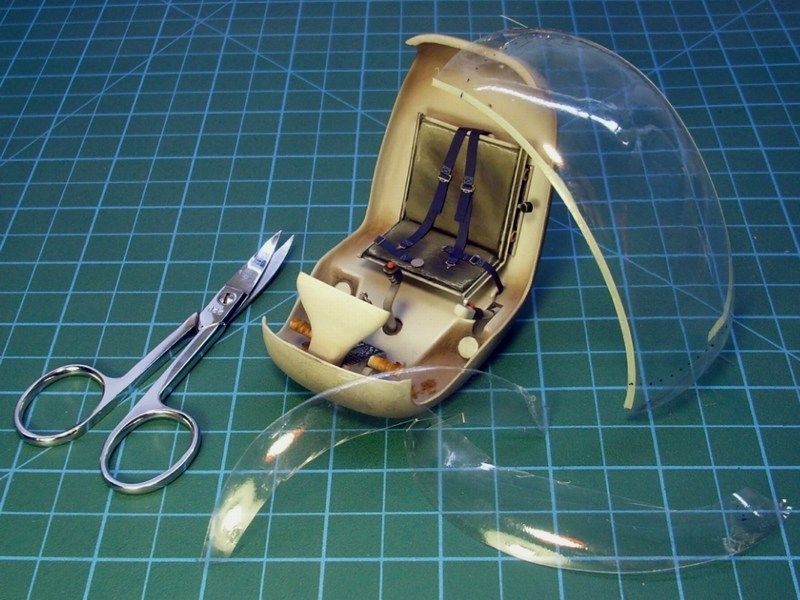 Düzenleyen Nick_Karatzides - 31/01/2016 Saat 01:35 |
|
|
|
|
|
Nick_Karatzides
Üye
Kayıt Tarihi: 06/06/2009 Aktif Durum: Aktif Değil Gönderilenler: 250 |
Gönderim Zamanı: 17/10/2011 Saat 02:40 |
|
After placing the clear canopy on cabin and adding few tiny drops of CA super glue just on few spots to secure the installation, small amounts of Squadron MMD green putty filled tiny gaps. Later, the green putty overages sanded lightly and the cabin prepared for airbrushing. The cabin was painted using the Life Color UA025 Light Gull Grey FS36440 acrylic paint and later the lower part was dusted by airbrushing a very light layer of Life Color LC37 Matt Burnt Umber FS3004 acrylic paint.

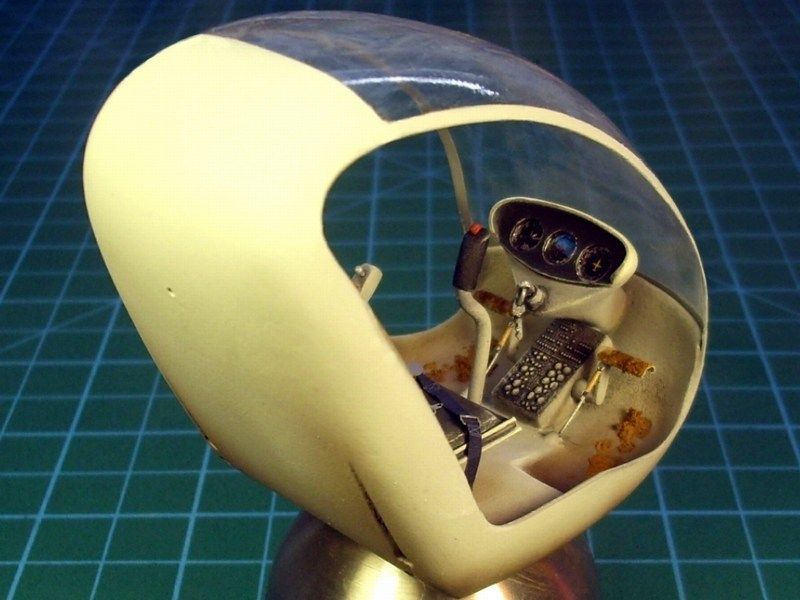 Düzenleyen Nick_Karatzides - 31/01/2016 Saat 01:36 |
|
|
|
|
|
Nick_Karatzides
Üye
Kayıt Tarihi: 06/06/2009 Aktif Durum: Aktif Değil Gönderilenler: 250 |
Gönderim Zamanı: 19/10/2011 Saat 21:27 |
|
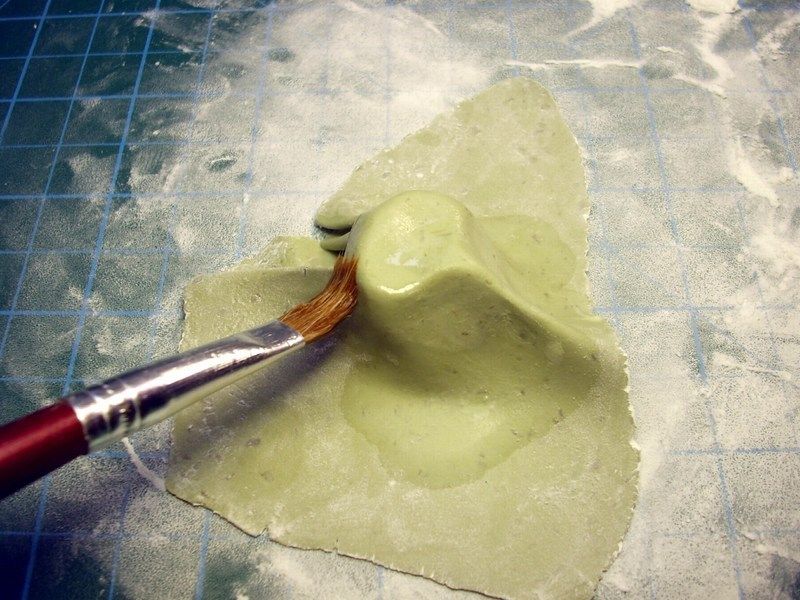
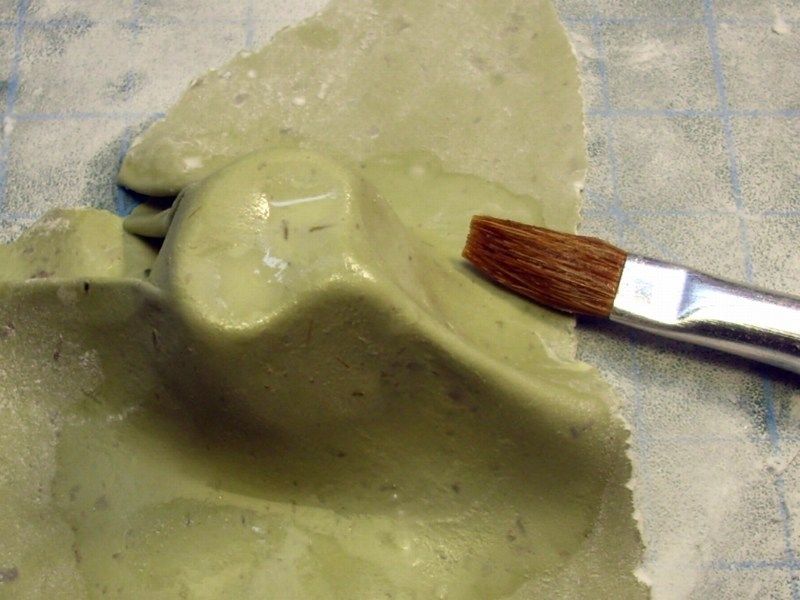
I almost forgot to build the instructors bicycle type seat in which he sits, next to the student pilot. Using plasticine, I made an image cast of how I would like seats surface to look like. I only had to push the material gently with fingers and got the desired shape - in fact, the process took less than 5 seconds. 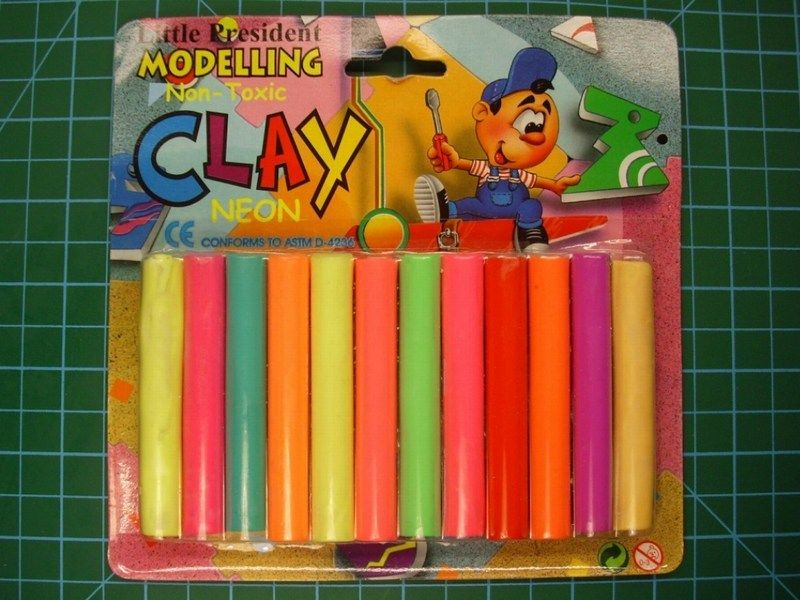
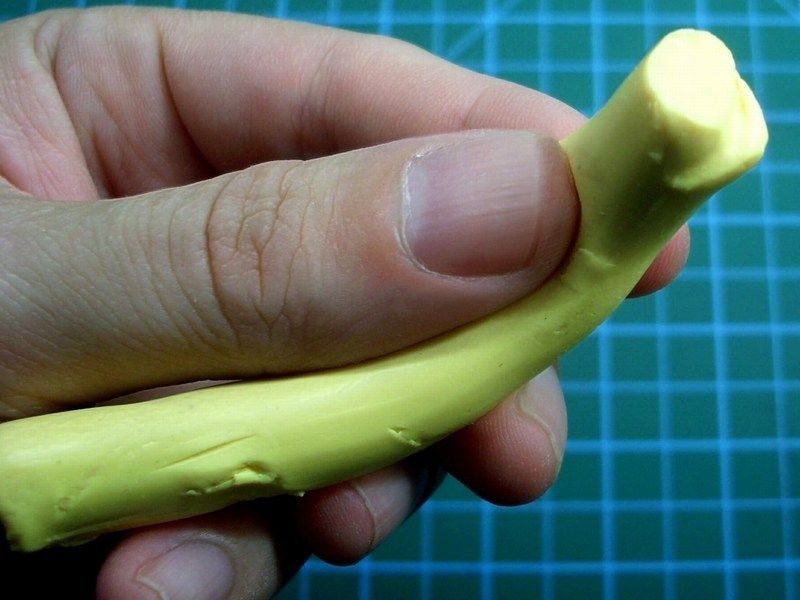
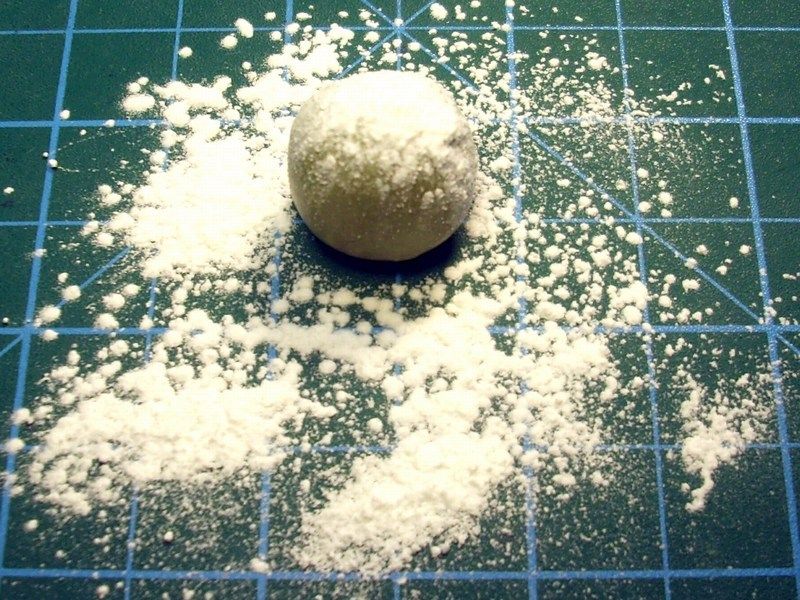
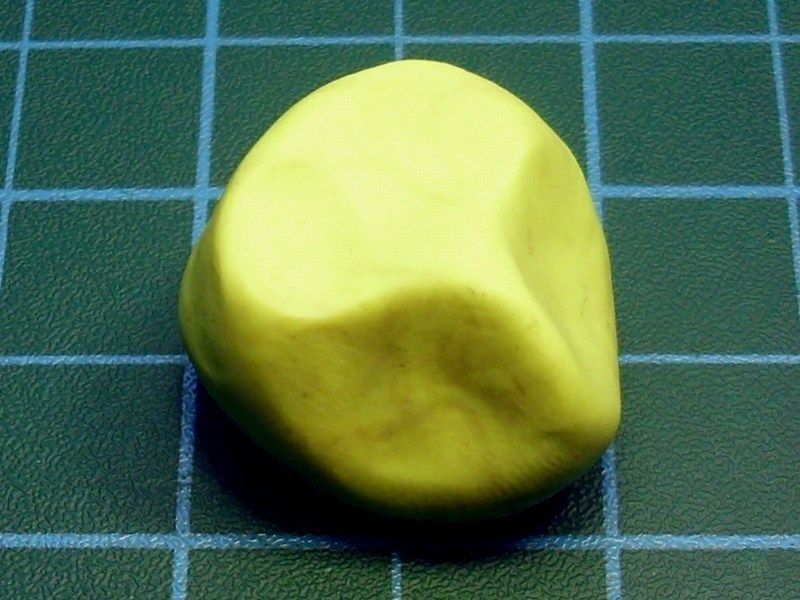 Using a small amount of Milliput putty, I made a small ball, dust it with talcum powder and pressed it against the working bench with a roller until it becomes as thin as could get. The use of talcum powder is necessary to avoid Milliput sticking on roller or fingers and get easier to handle without tearing to pieces. 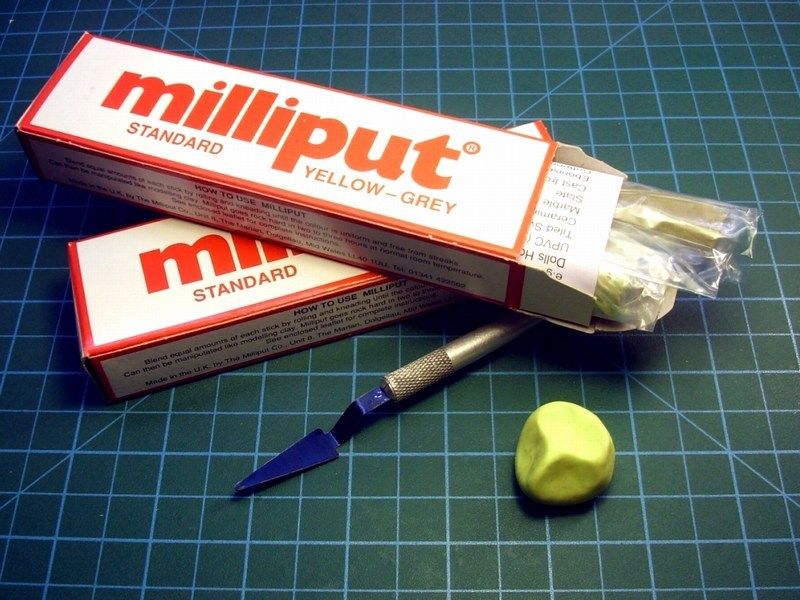
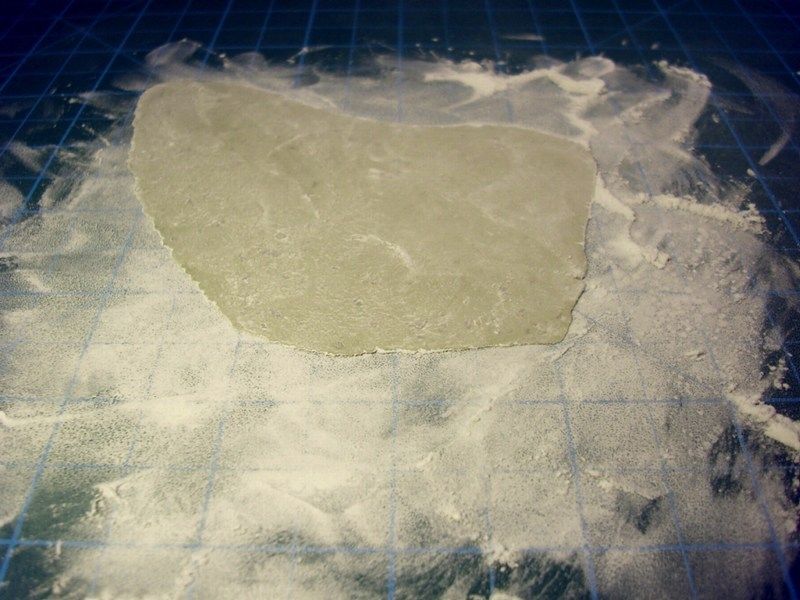 When the Milliput was pretty thin, I lifted it and place it on the plasticine image cast I made earlier, to let it follow the shape and curves of the seat. Using an old wet brush, I let few drops of water on the Milliput sheet, to make it softer and easier to follow the seat shape and left it overnight to get harden. Of course, the same technique can be also used to build blankets, truck covers, etc. 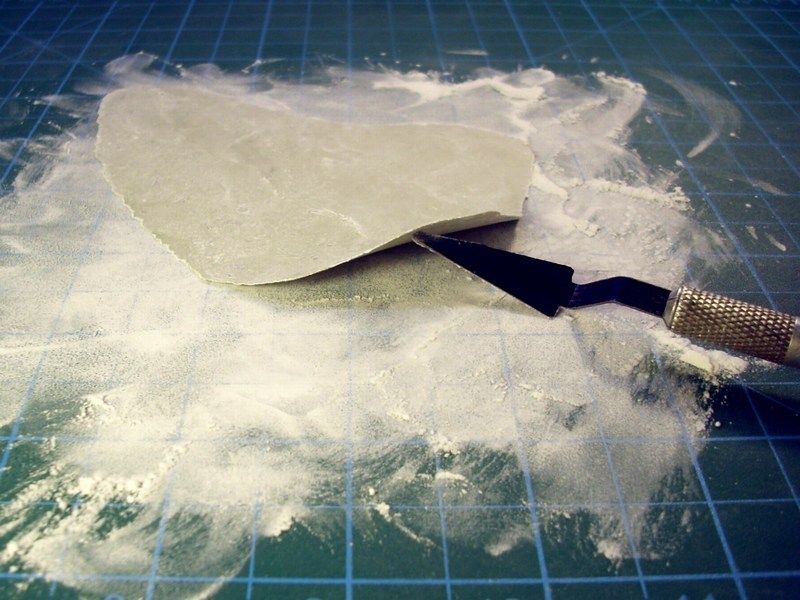
 I left the Milliput overnight to get polymerized. As soon as it was got harden, I removed the plasticine image cast and cut the seat, as shown into the following pictures. 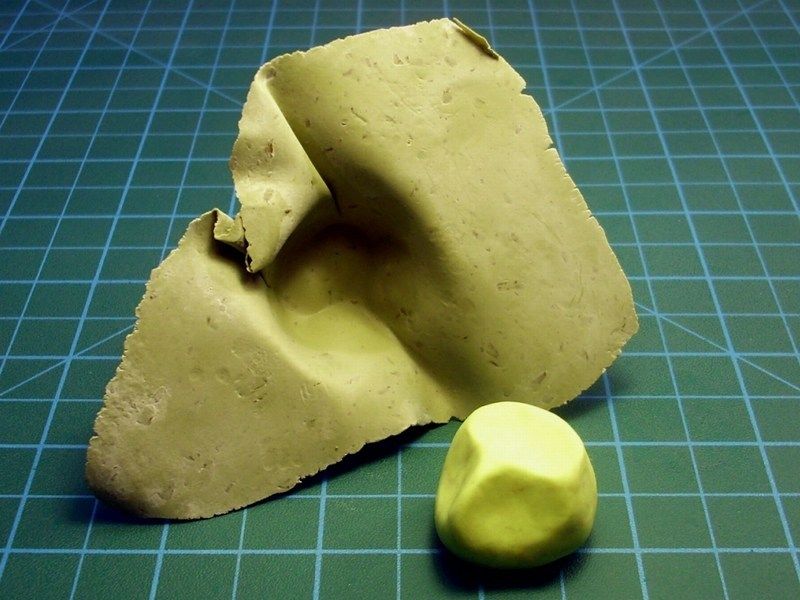
 Using airbrush, basic blue colour and shades of sand & rusty brown tones sprayed at low pressure to represent the weathering and dusting on the seat and the lower part of the landing pad with supporting base. After a satisfactory weathering result, the scale model was sprayed with mat enamel coat and left 24 hours to dry. Düzenleyen Nick_Karatzides - 31/01/2016 Saat 01:50 |
|
|
|
|
|
Nick_Karatzides
Üye
Kayıt Tarihi: 06/06/2009 Aktif Durum: Aktif Değil Gönderilenler: 250 |
Gönderim Zamanı: 19/10/2011 Saat 21:52 |
|
Final details were added and I tried some close-up pictures. Although initially I plan to represent a brand new bright n shiny Bölkow Bö-102 Helitrainer, I changed my mind during the building process and finally decide to present as found in an abandoned small airfield in Vlotho, where the Helitrainer used to rest for decades till found and finally donated to the Hubschraubermuseum helicopter museum in Bückeburg, Germany. The museum workshop team, managed to restore it and display it as on of these experimental helicopter training devices. That is why I preferred to add much wear, dust and stains from oil and scorched medals at several points and some rust as example in the exhaust. I tried black paper background (instead of white) & different light conditions. 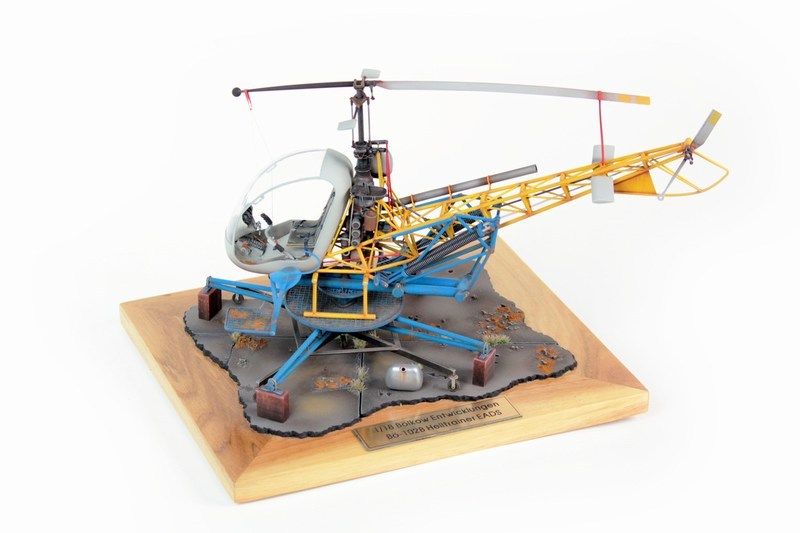
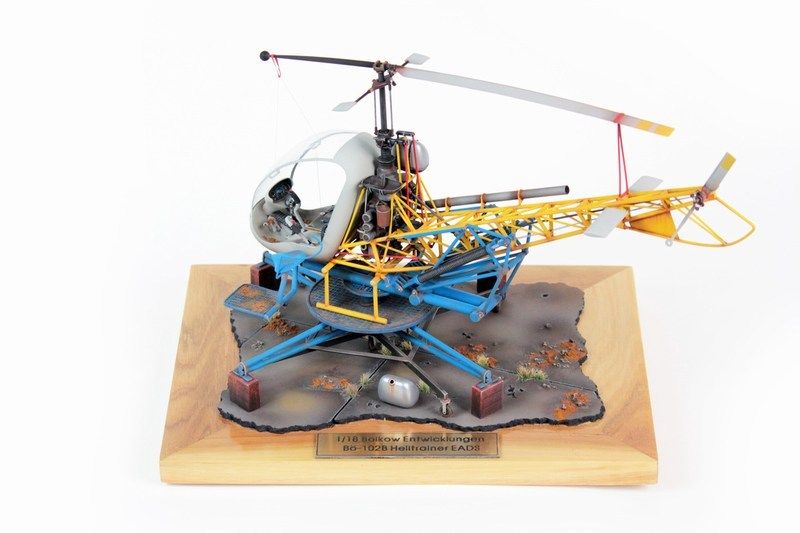
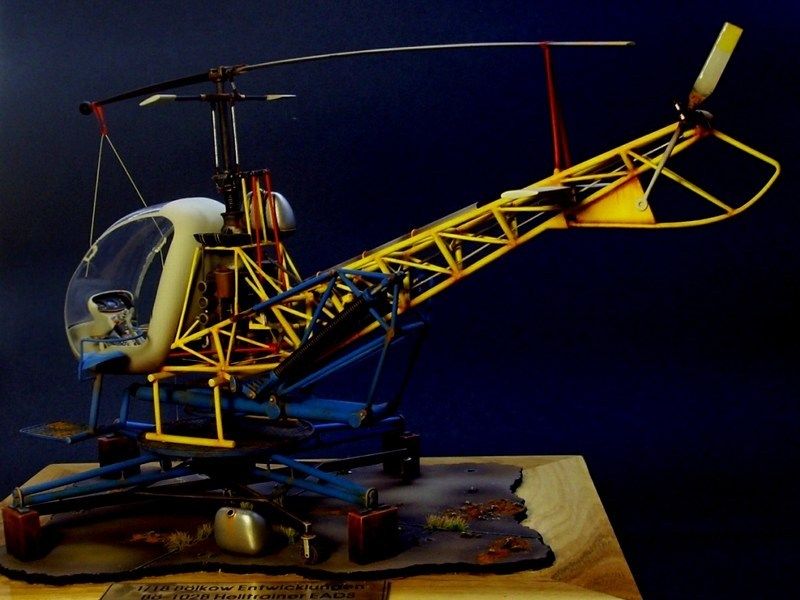
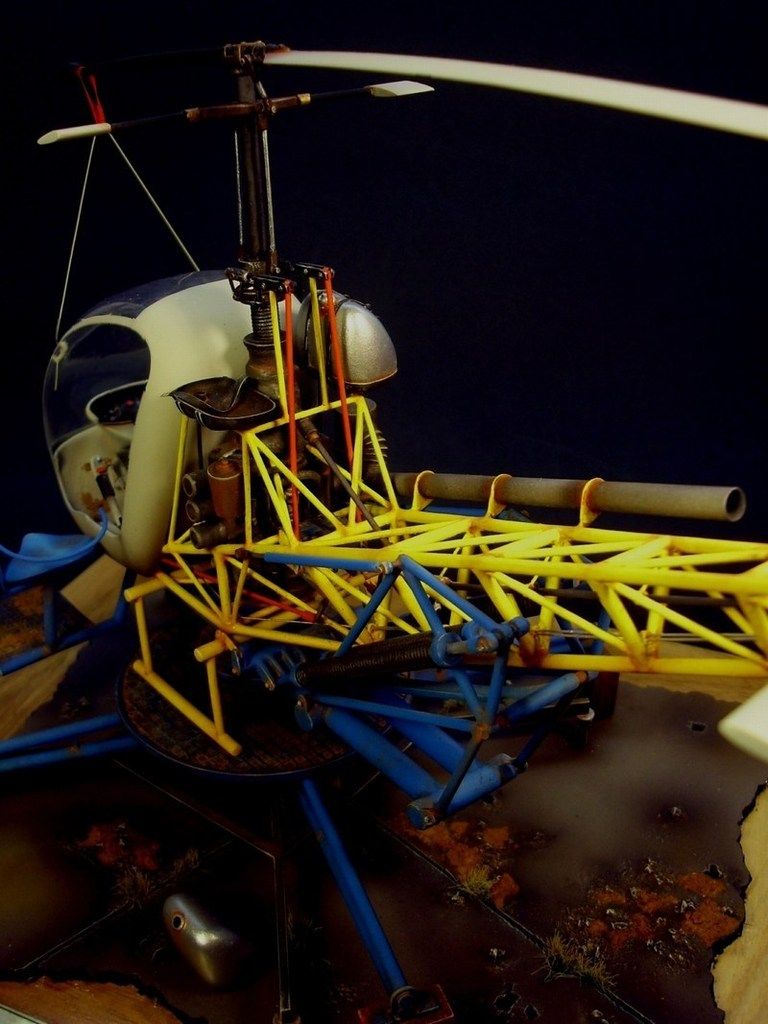
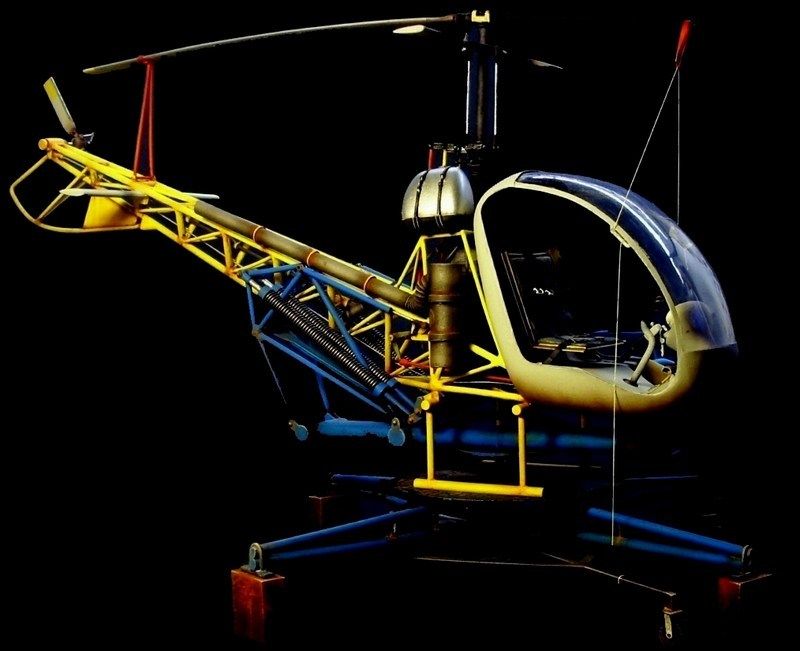 Düzenleyen Nick_Karatzides - 31/01/2016 Saat 02:04 |
|
|
|
|
|
amsl152
Yeni Üye
Kayıt Tarihi: 21/12/2009 Aktif Durum: Aktif Değil Gönderilenler: 1 |
Gönderim Zamanı: 21/10/2011 Saat 18:39 |
|
I am speechless; who could make any comment other than saying "just an amazing work and patience"
Congratulations for the piece of such an art .. |
|
|
|
|
|
Clumsy
Üye

Pervane Sever Kayıt Tarihi: 23/08/2005 Aktif Durum: Aktif Değil Gönderilenler: 1408 |
Gönderim Zamanı: 22/10/2011 Saat 08:29 |
|
Well, i have nothing to say but Bravo!
I was lucky see one of your work (red gyro) with my own eyes at Kavala two years ago and i hope to see this in the following contest again. Thanks for sharin' |
|
|
-Sorumluuu...
-Yok, yoook kesinlikle sorumlu de?il canym. Olsa olsa ancak sorunlu olur! -Peki o zaman. Sorunluuu... |
|
|
|
|
|
Nick_Karatzides
Üye
Kayıt Tarihi: 06/06/2009 Aktif Durum: Aktif Değil Gönderilenler: 250 |
Gönderim Zamanı: 28/10/2011 Saat 08:38 |
|
I would like to express my special thanks to:
[*]Mr. George Papadimitriou, owner of Hobby Gallery hobby shop and exclusive distributor for LifeColor & AK Interactive products in Greece, for his kind support and providing all the goodies I asked for - from A to Z. [*]My sweetheart wife, who actively participated in the project as an indispensable assistant, offering me relaxing neck massage while working on my bench. 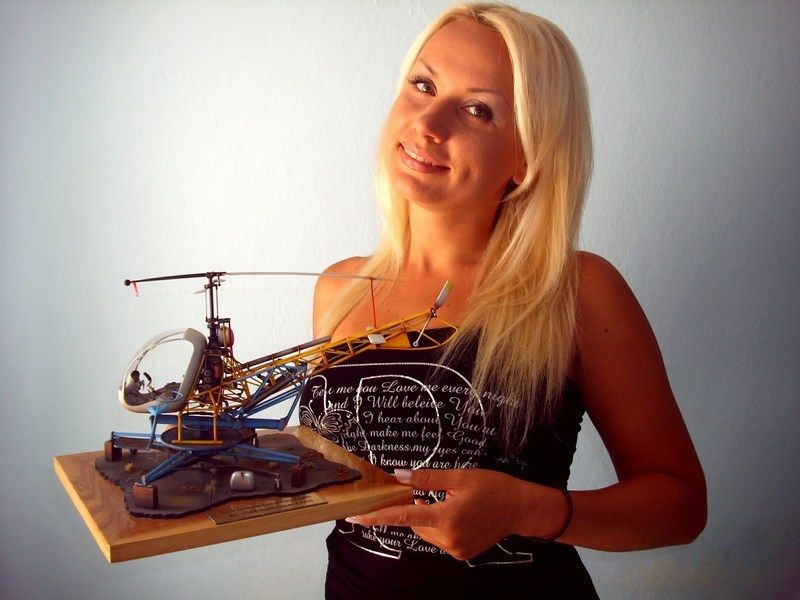
 Finally, for those who are interested to check more info & pics, feel free to have a look on our Anyuta 3D printed scale models products catalog. Wife as website operator & sales cordinator is always ready to answer customer questions regarding 3D printed scale model kit & diorama accessories products. Thank you all for following this thread and I hope you enjoyed reading this article. Ill meet you soon, on my next WIP - possibly a 3D printed.one. Regards, Nick 
 Düzenleyen Nick_Karatzides - 31/01/2016 Saat 02:05 |
|
|
|
|
| << Önceki Sayfa 2 |
| |
||
Forum Atla |
Kapalı Foruma Yeni Konu Gönderme Kapalı Forumdaki Konulara Cevap Yazma Kapalı Forumda Cevapları Silme Kapalı Forumdaki Cevapları Düzenleme Kapalı Forumda Anket Açma Kapalı Forumda Anketlerde Oy Kullanma |
|
